

This is the fifth week of the Spring 2023 One Room Challenge. This will be a bit of a longer blog because I have a sourcing saga and two weeks of content to cover!
All the guest participant links can be found on the One Room Challenge blog! You can also visit the week 5 link up page directly (and catch up with week 4 on that week’s link up page). This is an awesome event where everyone supports each other and has a great time working towards their own goals in these 8 weeks, so I hope you check out lots of participants!
This post contains affiliate links, labeled after the link. If you use the links to buy something, I may earn a commission, but there is no extra cost to you. I do my best to only link things for house projects that we’ve used ourselves and liked well enough that we would use them again. Thanks!
After I’d picked the color palette of deep blue and a mid-toned taupe to play off the gray tile in our bathroom, I had to pick the finishes for the metal elements of the room. I talked in Week 3 about how we wanted to keep the faucets brushed nickel to stay consistent with the tub and shower hardware that we were keeping from the original space. That meant that to bring in our warmer metal element of antiqued copper, the light fixtures would be our biggest impact element. This, plus the Victorian direction I wanted the room to lean, is what kicked off a long search for lighting.
For the water closet, I was leaning toward a pendant over a flush or semi-flush mount, since we have fairly high ceilings in the bathroom.
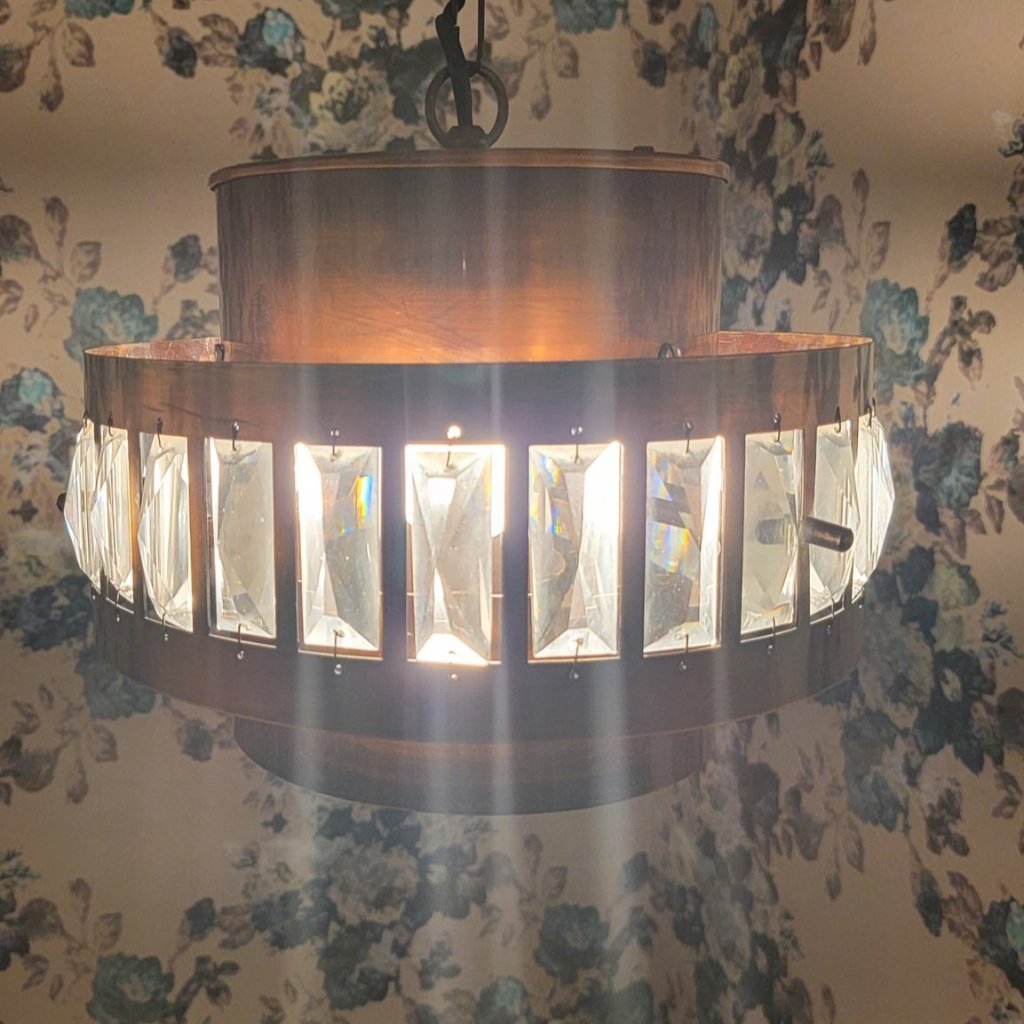
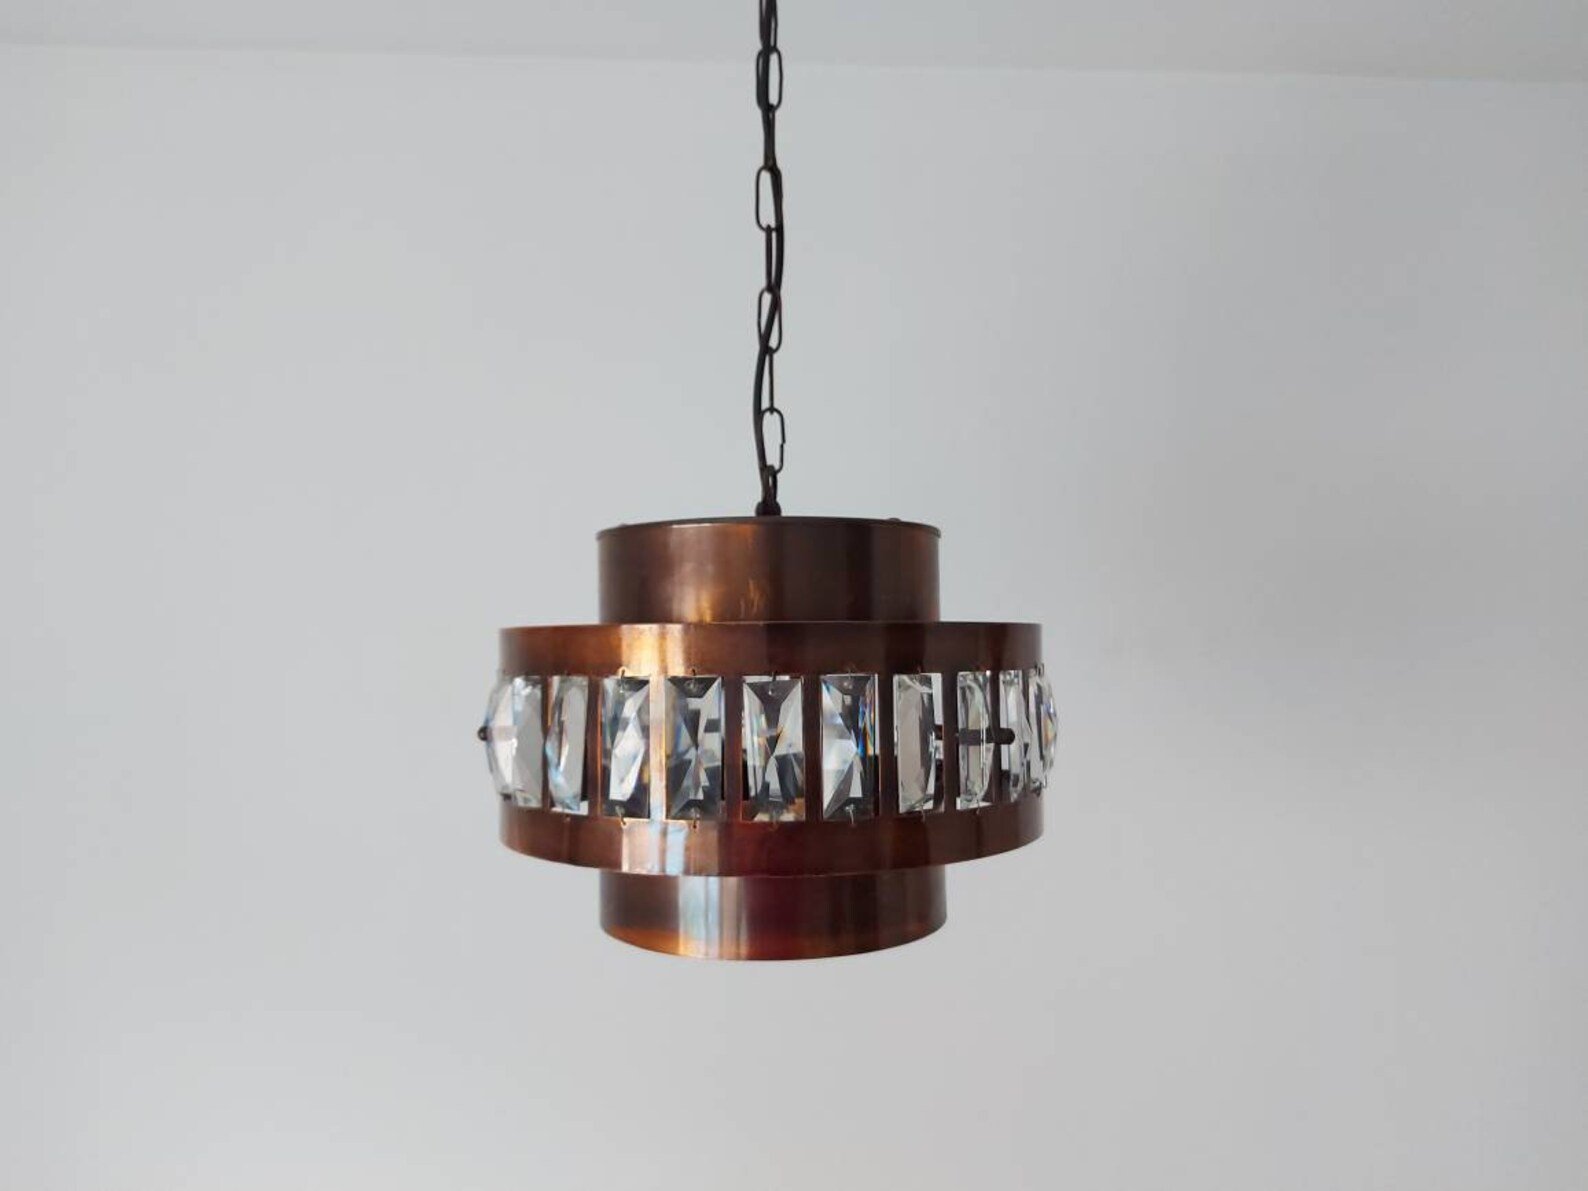
TheSpicyVintageShop on Etsy had just what I wanted, in the form of this vintage chandelier from the 1970swith copper and crystals. While it was being shipped from Slovenia, the listing specified that the wiring would work here in the US as well. It arrived quickly and was packed up really securely, and I was immediately in love with the piece!
When it came to finding vanity lights, I was stumped for a long time. I didn’t feel like the typical three-bulb vanity lights fit the design I was planning, and it was really hard to find fixtures in copper rather than in brass or black. I even pondered learning how to construct lights, or using pendants above each sink.
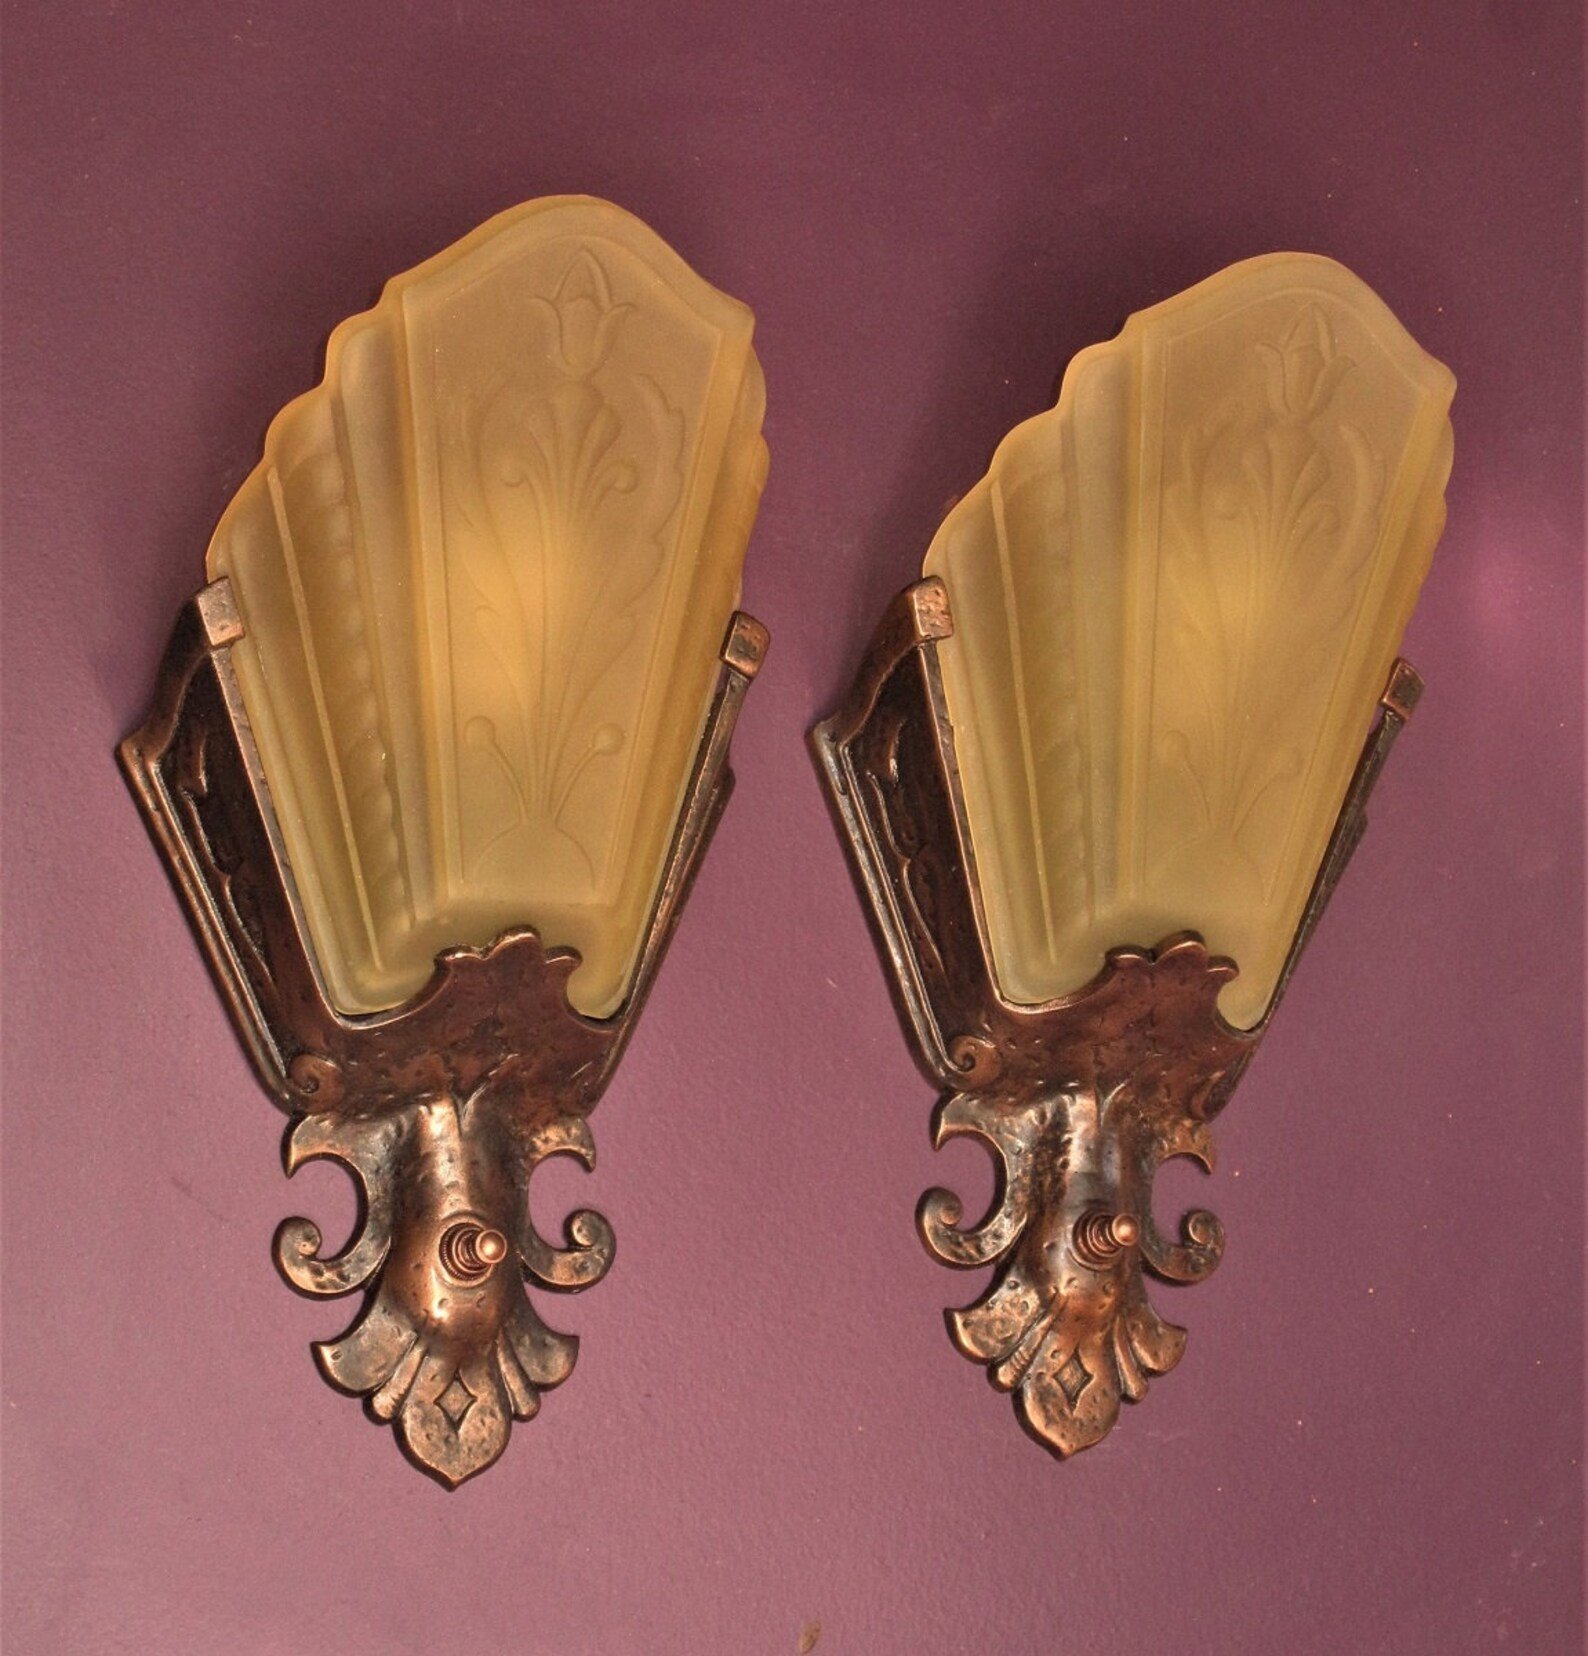
Then, after a ton of searching, I found these beautiful slip shade lights from the 1930s. After confirming with the seller, AntiqueLighting, that they were rewired to UL standards, I bought two pairs right away. I was so glad when these arrived safe and sound, again packed very securely. It was very cool to see antique lights that could be given new life with modern wiring, and I feel like this bathroom is not the only place I’ll be using vintage and antique light fixtures.
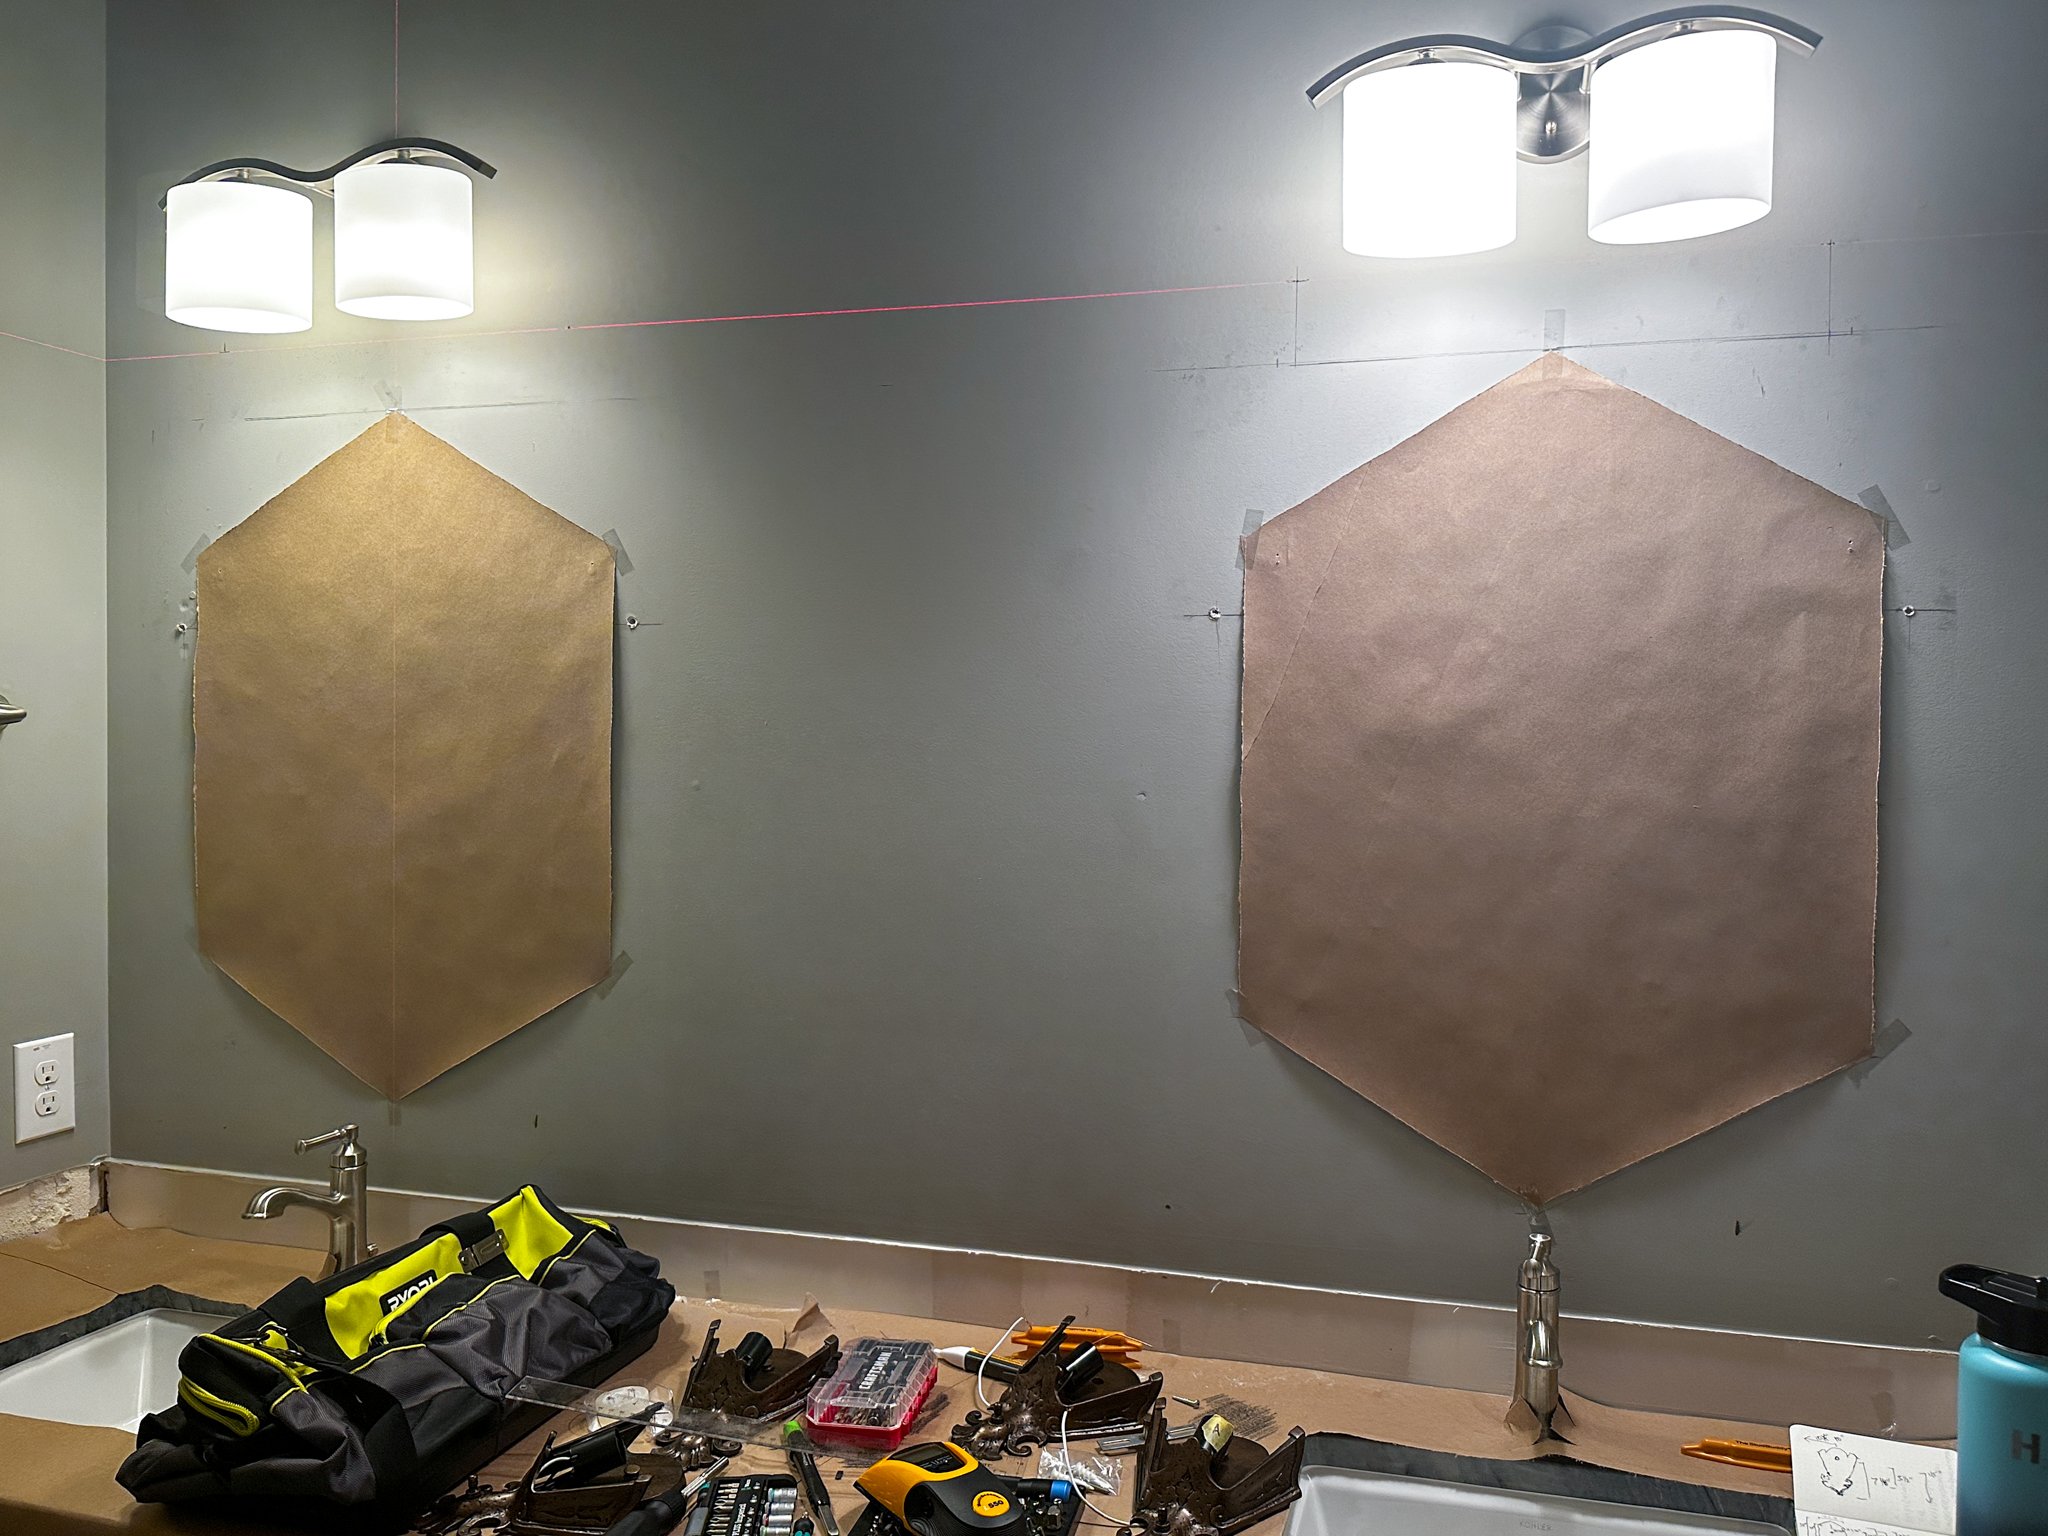
The next thing we had to do was plan out where the vanity lights were going to go, since we were moving from having one fixture above each mirror to positioning four lights, one on each side of the two mirrors. Also, since our new countertops were already in place, protecting them was a key step in getting ready for light installation! I was really glad we had this rosin paper (affiliate link) in place before the tools came out and the drywall started flying. Matt made paper patterns for laying out the mirrors on the wall, and you can also see his sketch of the light fixtures and their mounting mechanism in the bottom right corner of this shot. With his laser level, a lot of double- and triple-checking measurements, and me coming in to get the full zoomed out view, he marked where the new wall sconces would be mounted.
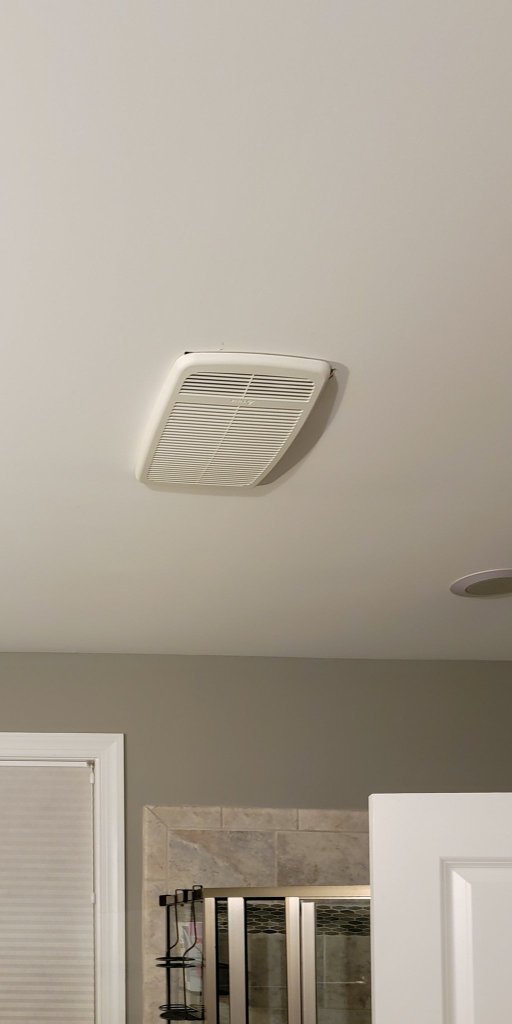
There were actually two other things we were getting done while the electrician was out installing the lights. The first was to move the outlet on the left side up just a bit. In its current location, we could have tiled around it for the backsplash but it would have broken the plane of the backsplash meeting the wall, which wasn’t a look we wanted. The other, which ended up being the most substantial part of the work over the past two weeks, was changing out the existing bathroom fan for one with a heater.
Since we weren’t changing out the flooring, putting in a bathroom fan with a heater seemed like a great way to put a heated element in the bathroom to help with that post-shower chill. After a lot of research, we ended up selecting the Delta Breez Radiance Series Fan with Heater. We already have a couple of lights on their own switches over the tub and shower, so we didn’t feel like we needed a model with an overhead light or a nightlight. We also picked up a Leviton timer switch so that we could make sure the heater wasn’t accidentally left on when we weren’t in the room.
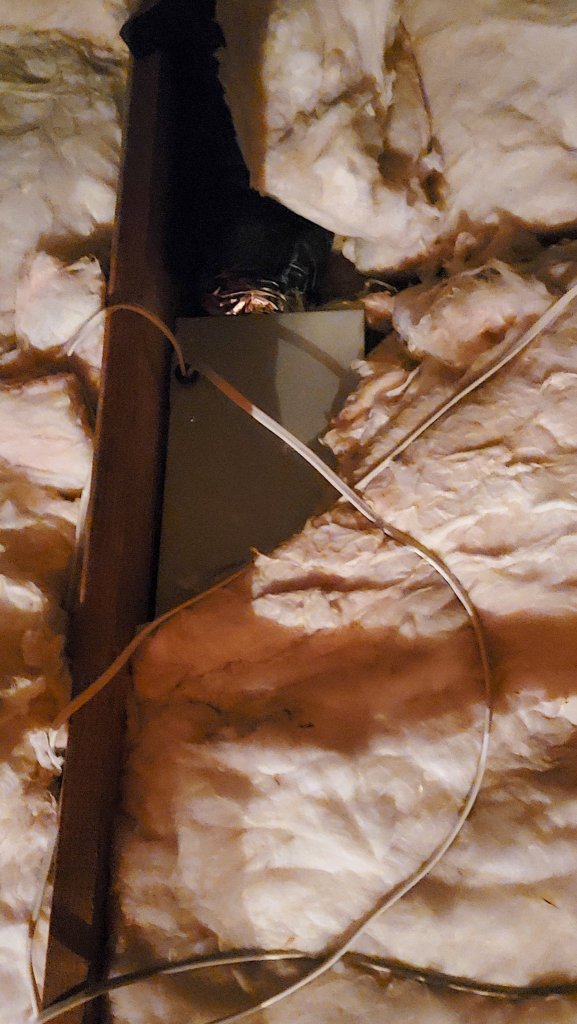
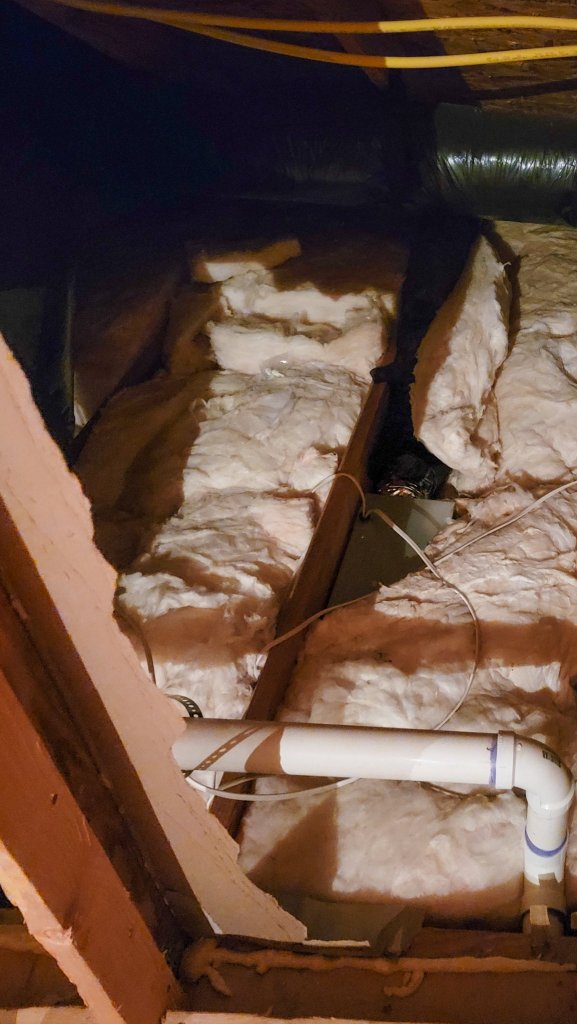
I’ll start this explanation off by saying that I am not an electrician at all, let alone a licensed one, and I definitely recommend our route of having a licensed electrician do your electrical work for projects. This is more to cover the steps involved so you know what to expect when going from a bathroom fan to one with a heater, because it is definitely more involved than changing out a light fixture. We did already have the duct in place from the existing bathroom fan, as you can see here in the attic shots. Speaking of the attic shots – the fan itself needs to be secured to an attic joist. It was good that we had attic access to do this, so we only need to repair a little drywall around the fan, but this is still something to consider because working in attics brings its own set of challenges. Finally, the heater inside the fan needs a dedicated 15 amp circuit. This was a ton of work and I’m glad we had our electrician here to do it, but I am also really excited to have a heater right outside the shower door now!
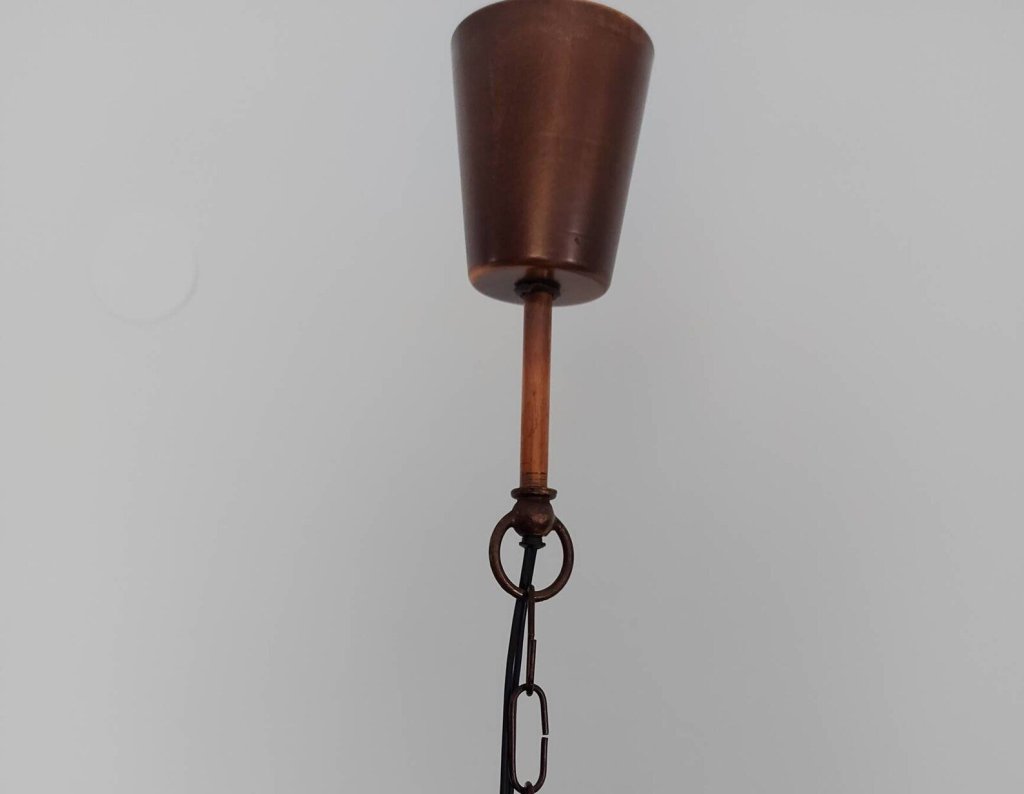
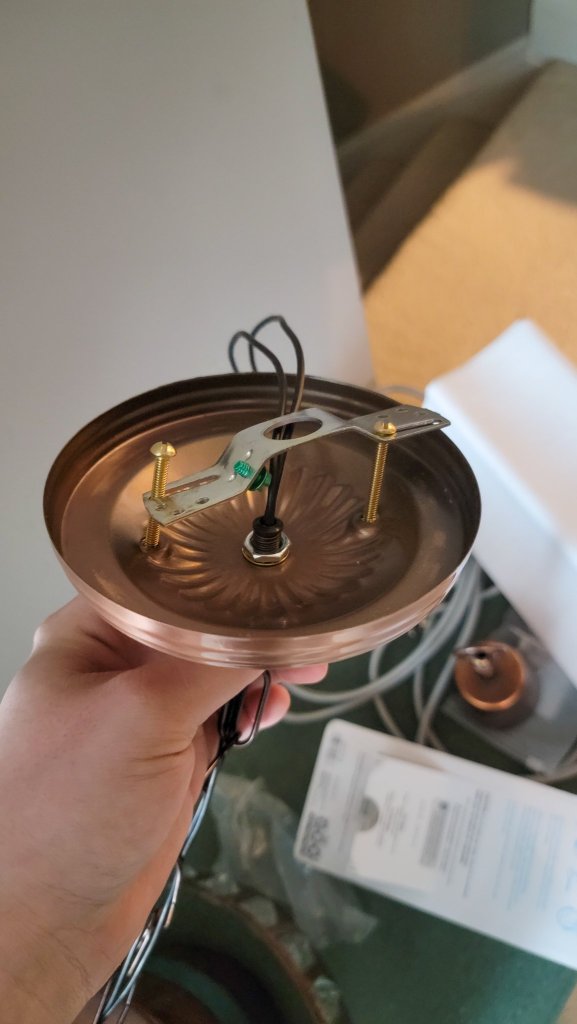
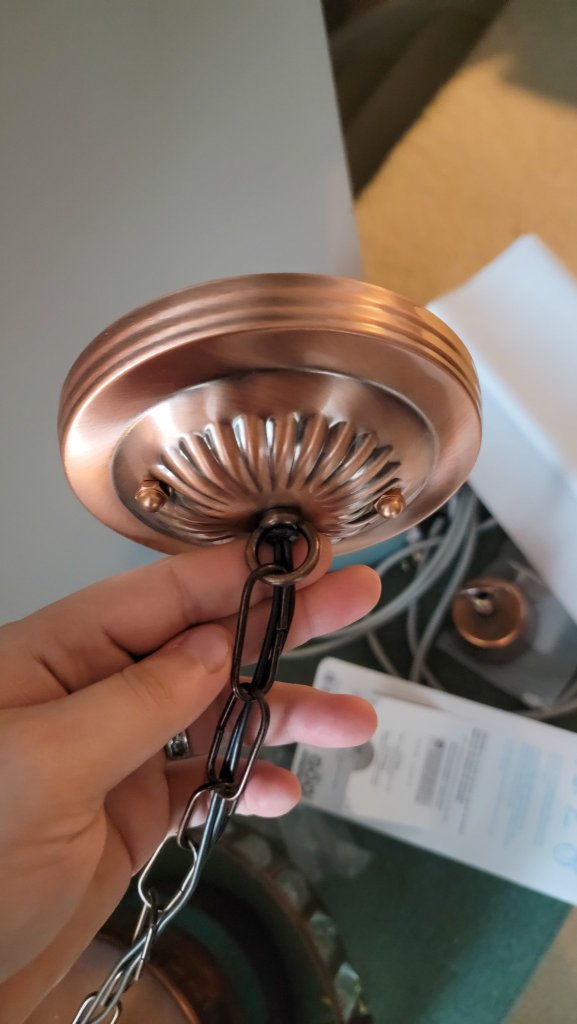
We also had a little adapting we had to do on the chandelier fixture. The wiring and chain ended in this small copper cone, which had no way to attach to the ceiling electrical box. After researching various pendant lamp attachments, I found this canopy kit from B&P Lamp (affiliate link). It came with all the hardware we needed, including a crossbar, and still had some nice detailing so it fit with the fixture’s style. Matt removed the cone and the pieces that attached it to the chain, then ran the wires through the center of the canopy and attached the chain to the matching loop. It was a pretty straightforward process, and now the light was ready to attach to the electrical box. We also added a small ceiling medallion to make sure the box was fully covered. I guess we did get to do a little of my idea about constructing light fixtures after all!
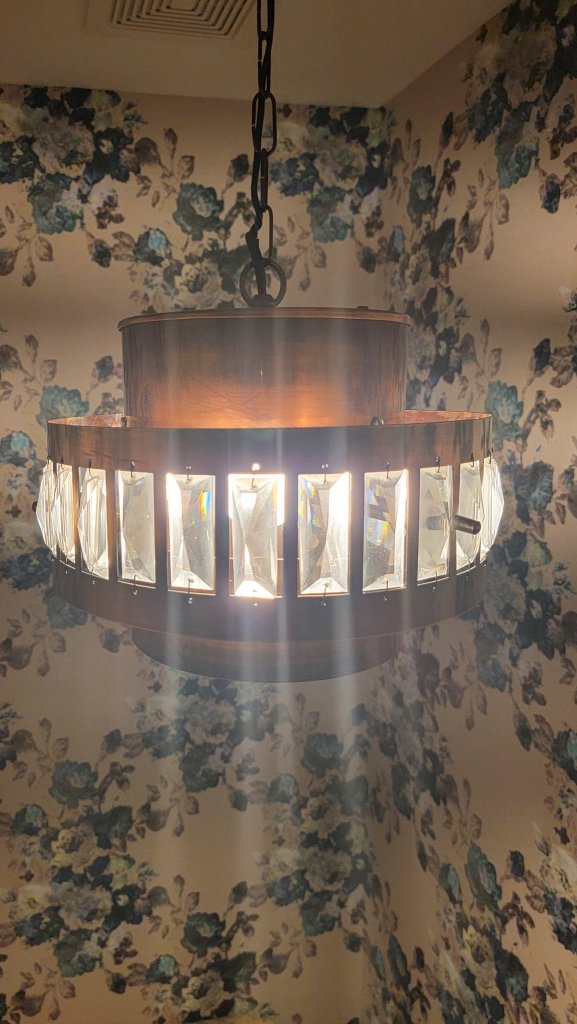
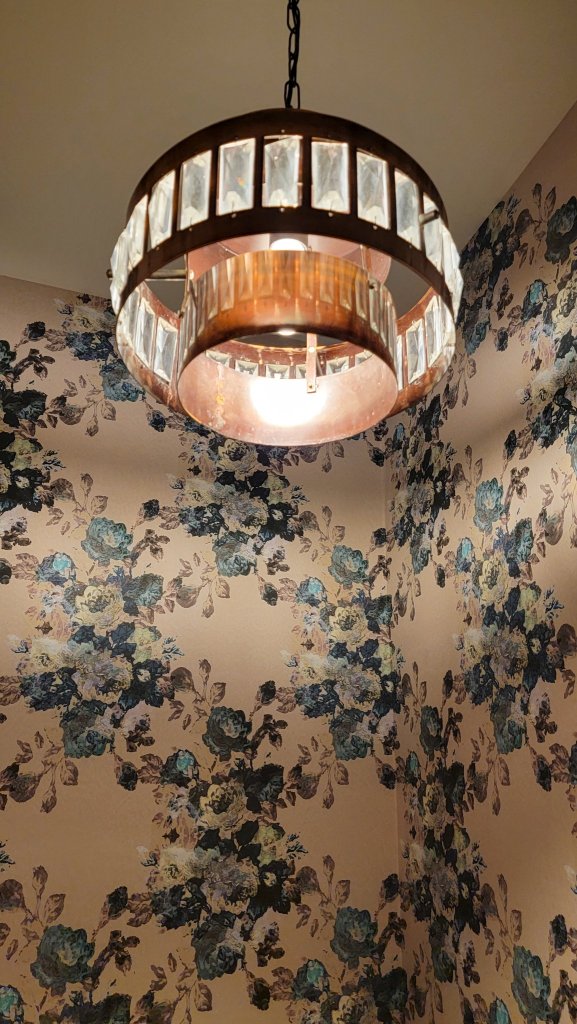
I love the lighting through the crystals in this chandelier!

There is definitely some drywall repair upcoming for week six of the One Room Challenge, but it is so worth it to see the new lights in place. We’re leaving the shades off for the moment because we still have that work and then a lot of painting, but you can already see how much it changes the feel of the room. I can’t wait for these next few weeks!
