


This is the seventh week of the Spring 2023 One Room Challenge. We’re almost to the end, and we did a ton of work this week to get ready for painting.
All the guest participant links can be found on the One Room Challenge blog! You can also visit the week 7 link up page directly (and catch up with week 6 on that week’s link up page). This is an awesome event where everyone supports each other and has a great time working towards their own goals in these 8 weeks, so I hope you check out lots of participants!
This post contains affiliate links, labeled after the link. If you use the links to buy something, I may earn a commission, but there is no extra cost to you. I do my best to only link things for house projects that we’ve used ourselves and liked well enough that we would use them again. Thanks!
This week was all about making sure we were ready for painting, the last major part of the bathroom update. That means anything that might impact the walls or the cabinets had to be knocked out. When you’re working with a higher sheen paint (like in a bathroom), touchups are way more apparent and you often have to repaint much larger portions than you normally would for touchups. That meant this week was patching up the drywall and tiling the backsplash!
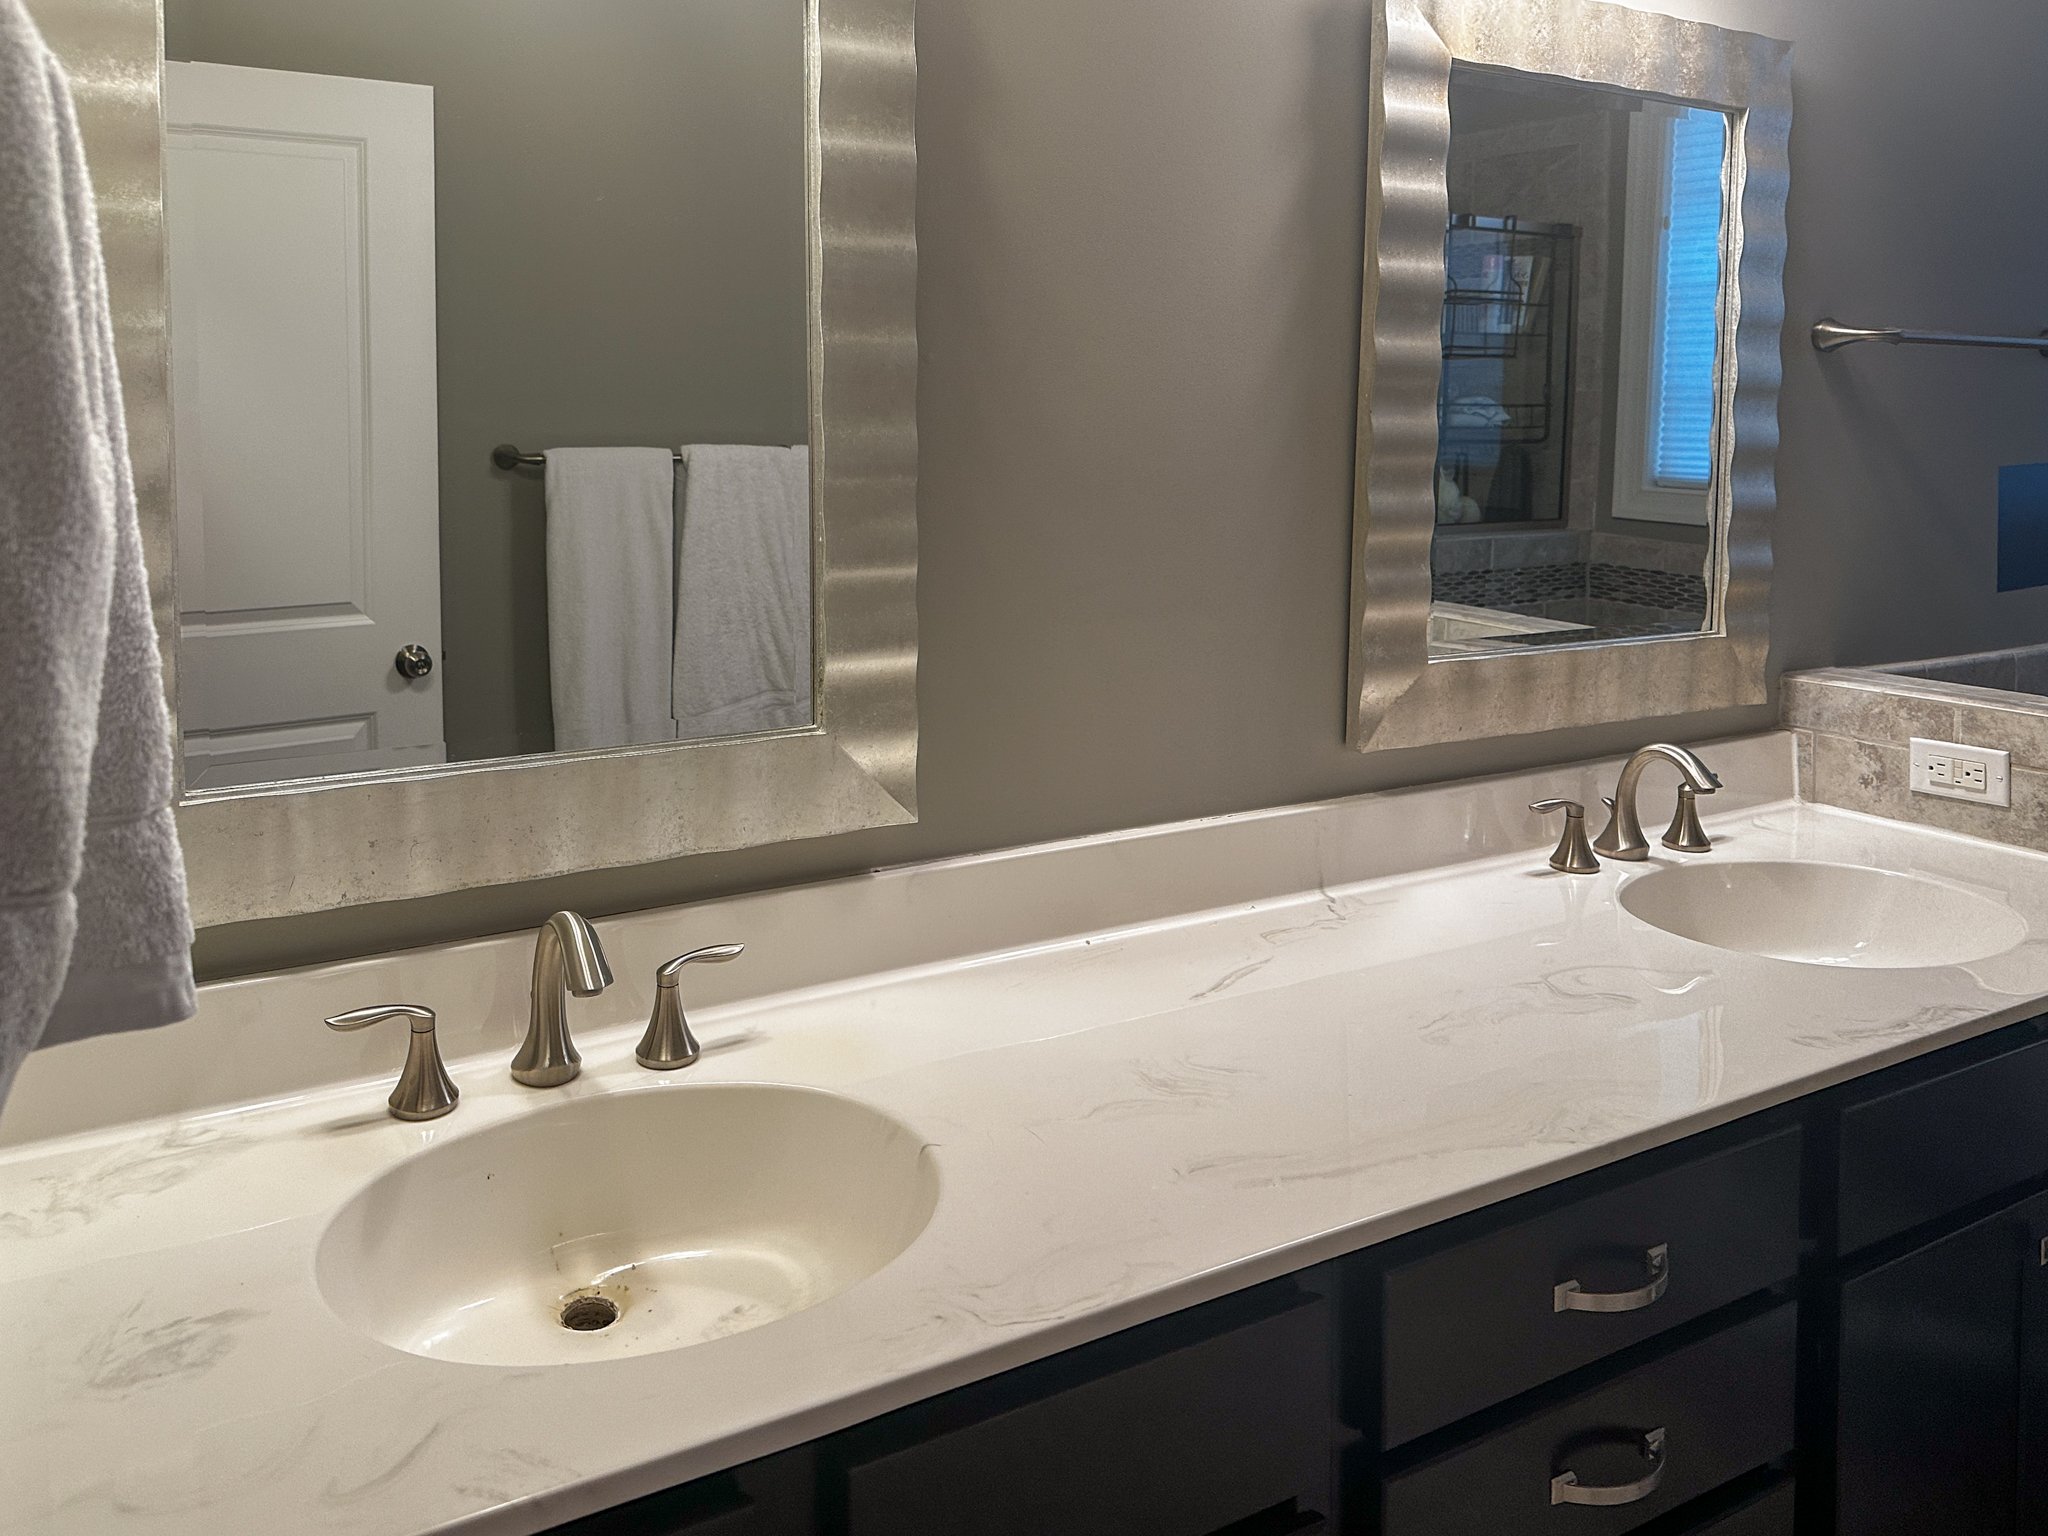
Looking back at the original bathroom counter, you can see that the counter curved up into the backsplash. It also formed a sidesplash on the left side of the bathroom counter. Because our counter material was such a central piece of the design, I wanted a backsplash that was more of a background element. What ended up working best for the design and for making the updates feel like they fit with the existing tile was the idea to wrap the same tile around the back and left side of the counter as is on the short wall to the right of the counter. We also wanted to match the height of the tile on the right side, which is why we needed to move up the outlet on the left I mentioned in Week 5.
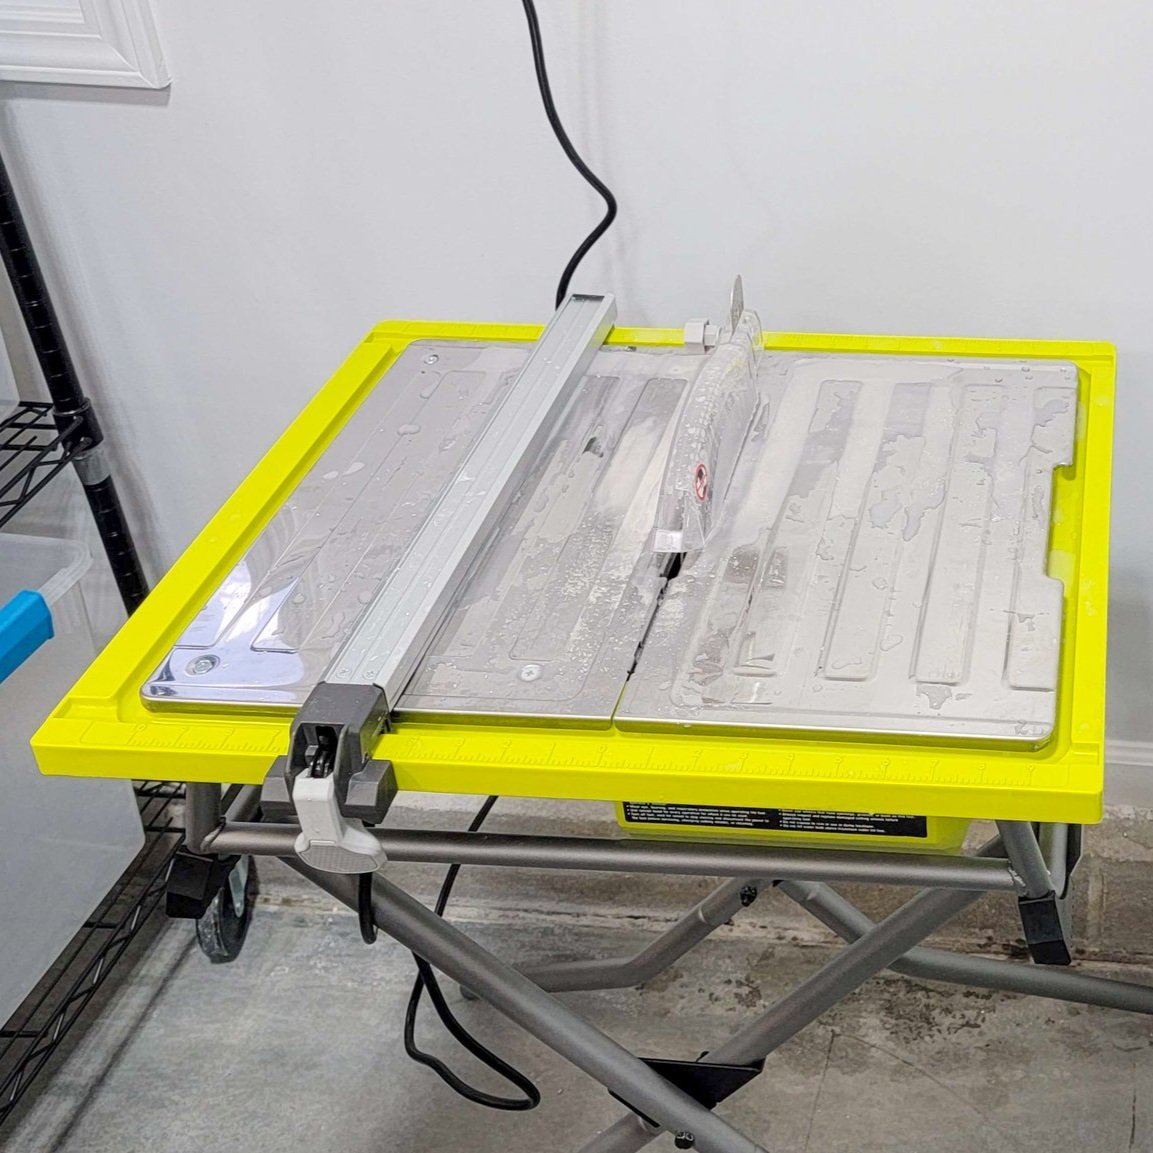
We have never tiled before – and at this point the memory of all the thinset and grout work is too fresh in our minds to know how frequently we will do it in the future – but we wanted to give it a try for this small backsplash. I’d seen Monica at House of Esperanza use the Ryobi tile saw on projects, and her videos of using it made it seem like a pretty approachable way to cut tile. We actually were able to find it with the stand for around the same price as without the stand at Home Depot. Matt made a diagram of all the cuts we would need, and started doing test cuts to make sure we would get just the right measurements.
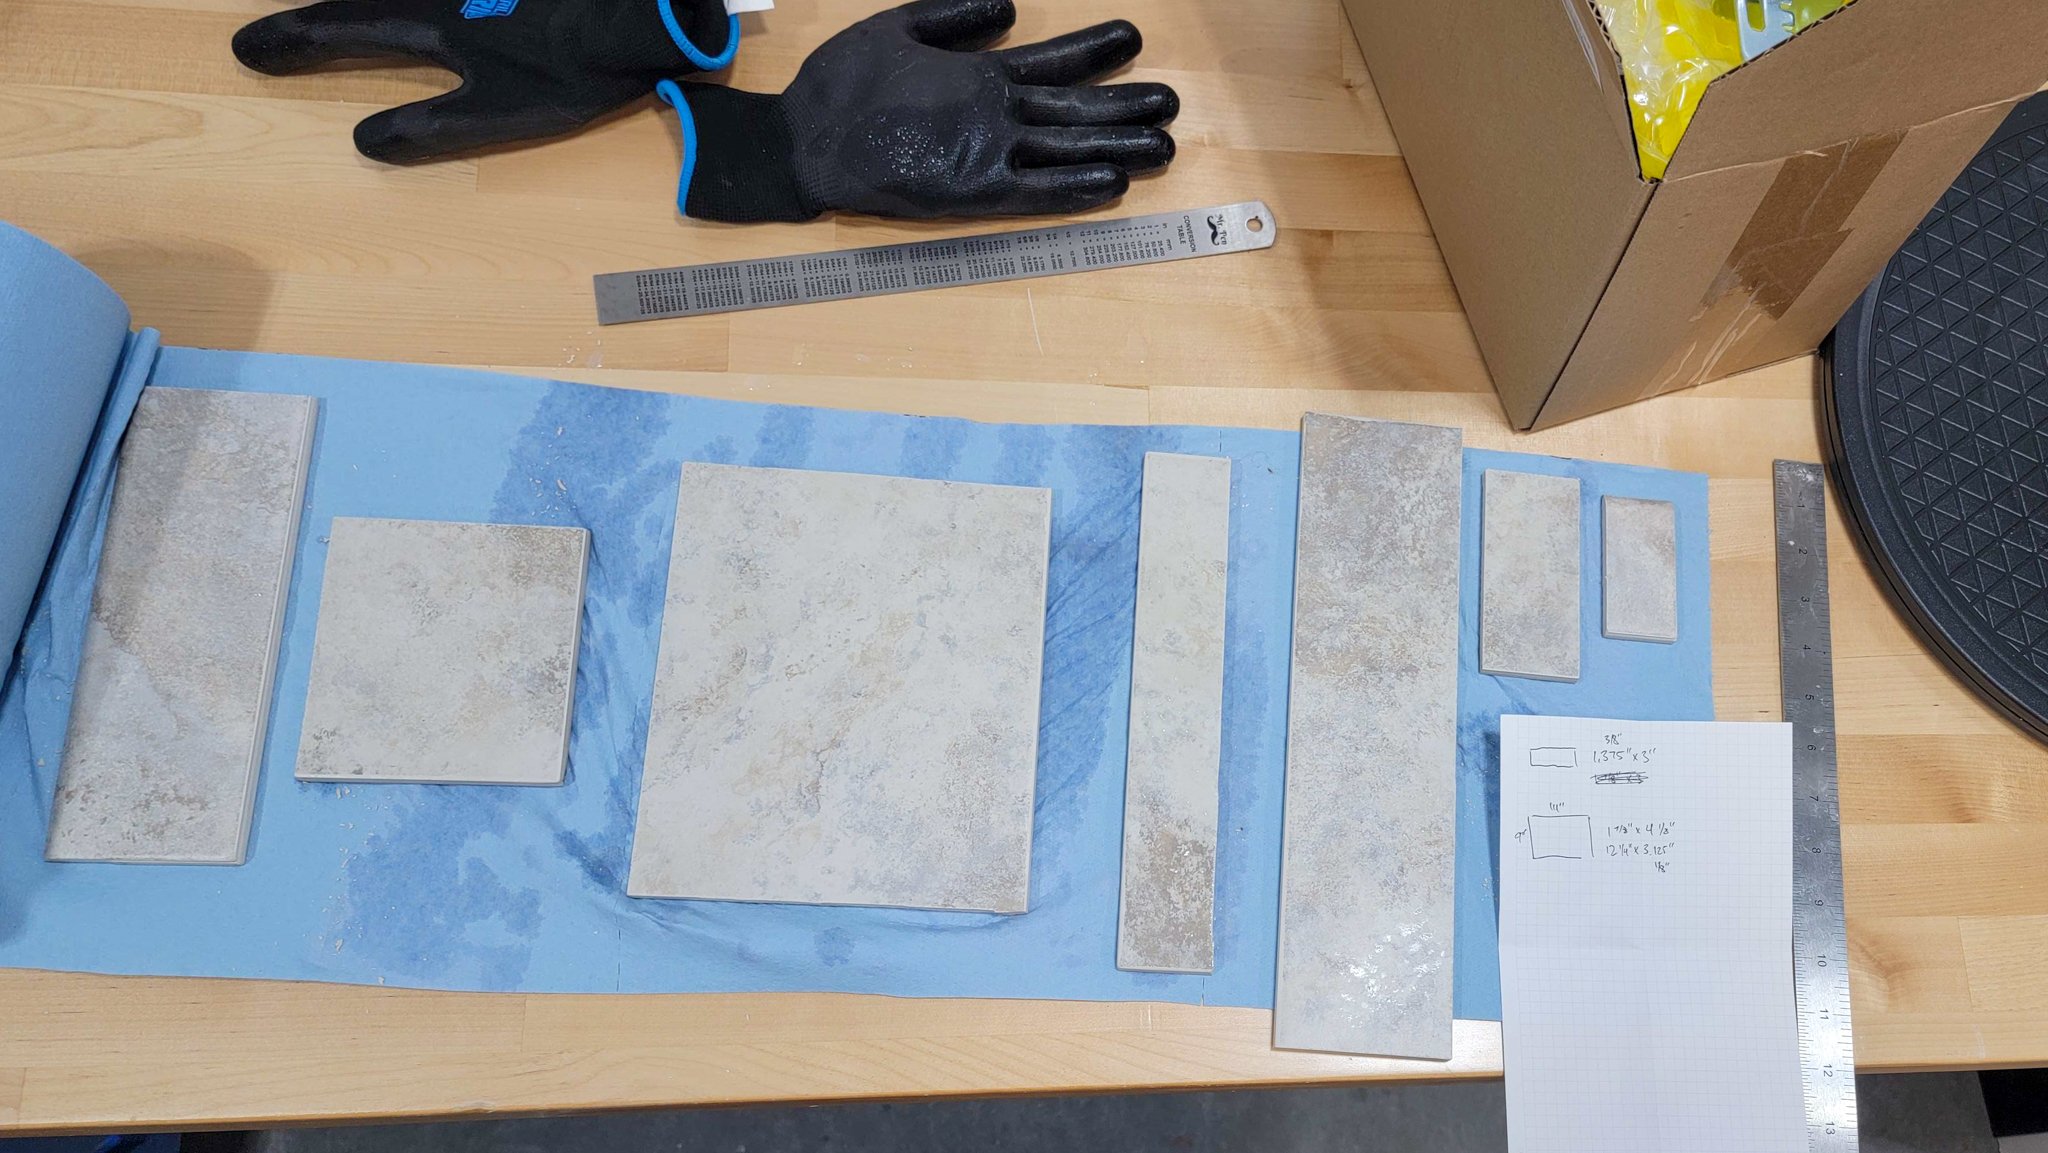
We were lucky enough to have full boxes of the Daltile Grigio Perla porcelain tiles used in the rest of the bathroom left behind by the previous owners, including a box of bullnose tile we could use for the top edge of the backsplash. From there, it was just a matter of cutting the larger tiles into almost a long subway form factor to fit between the bullnose tiles and the counter.

To match the existing tiling in the room, we were going with a 1/4” spacing between the tiles. We got 1/4” leveling spacers from Accufloor (affiliate link), which go along with these reusable wedges (affiliate link) to hold the tiles in place. This meant that we could assemble big portions of the backsplash to get them ready to apply to the wall with thinset.
Here you can see the right side of the backsplash, with the bullnose tiles at the top and the cut pieces of the larger tiles below. It is a little taller than a standard backsplash, but I really liked how it matched up with the short wall to the right.
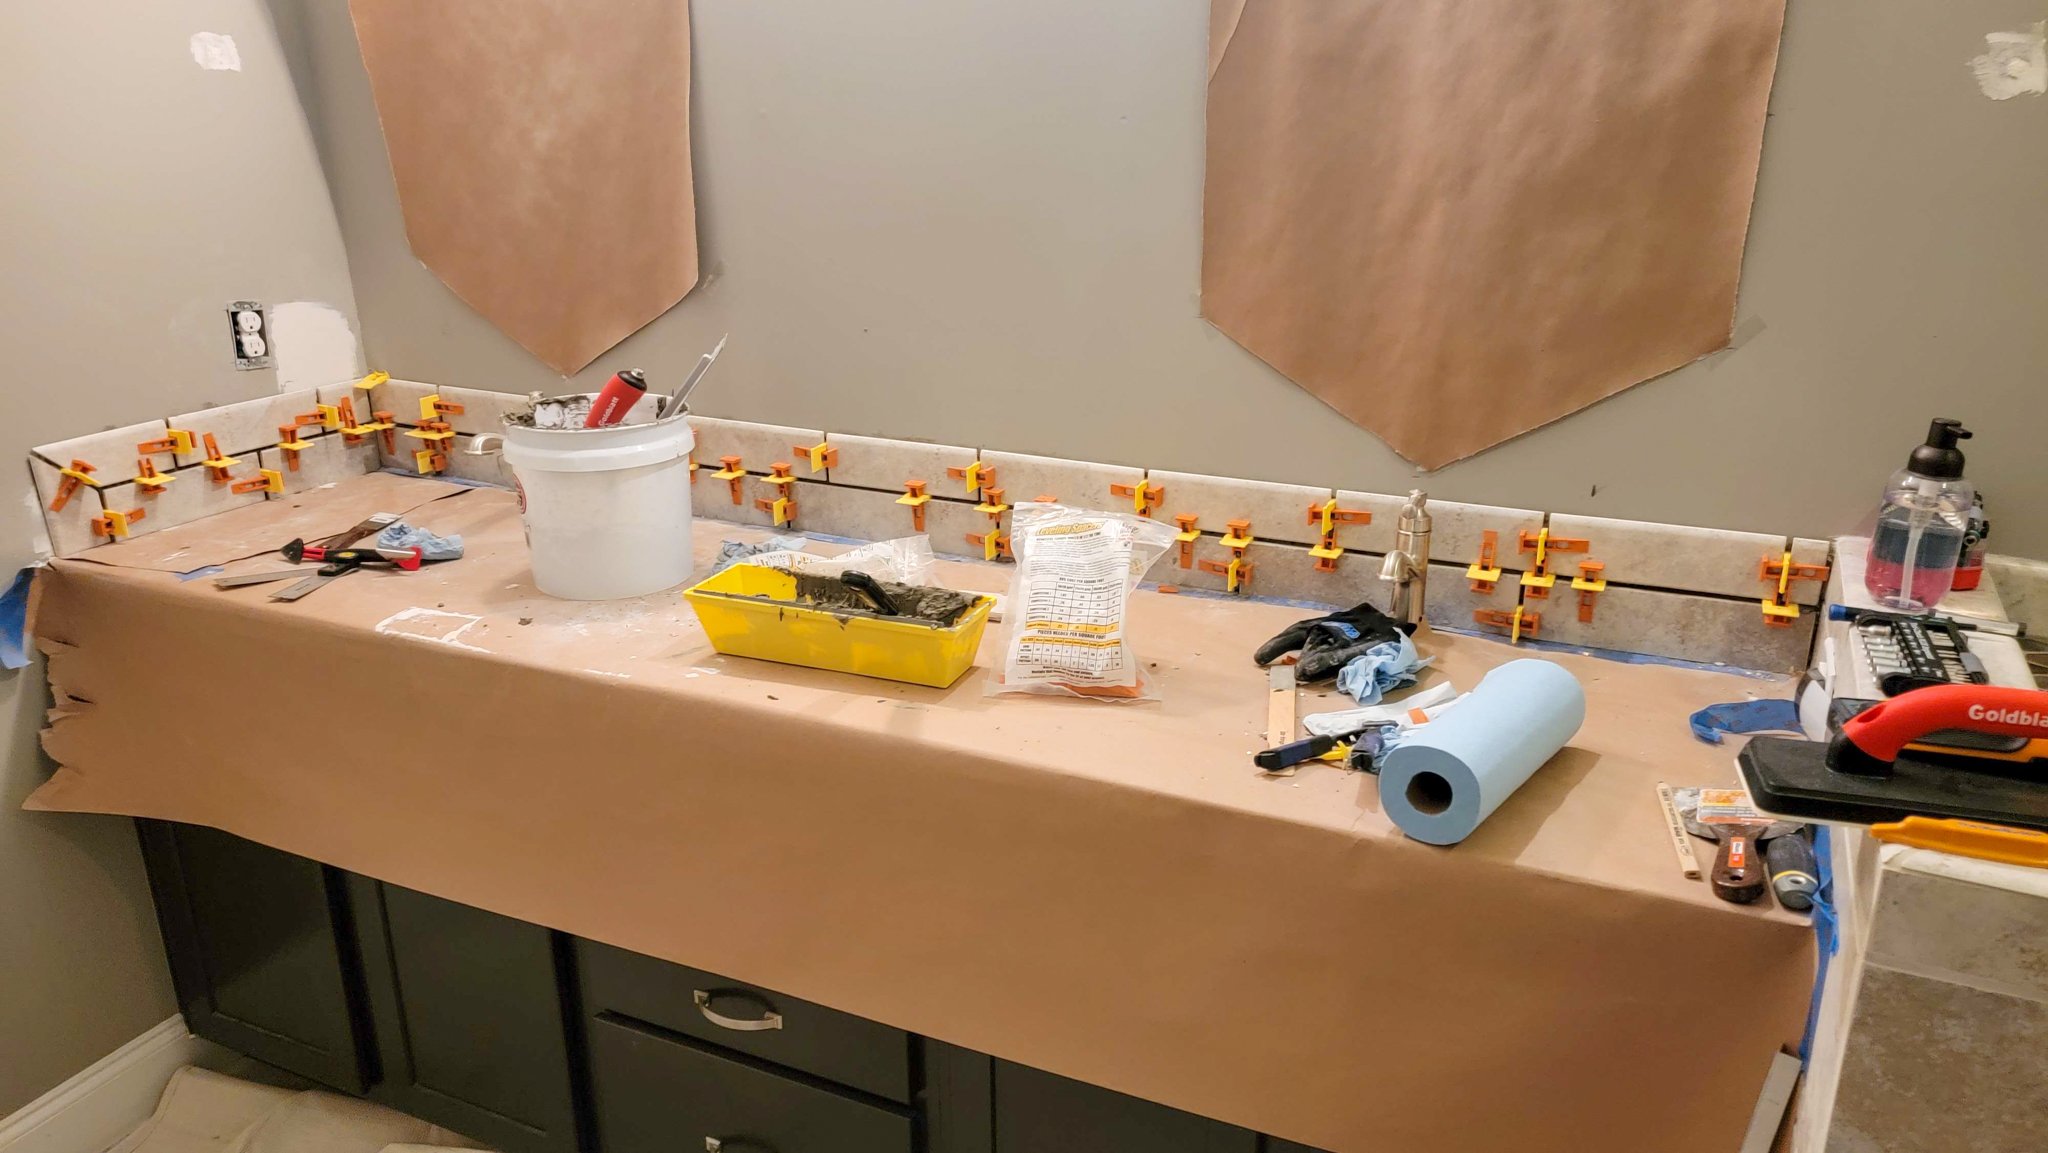
After a long evening’s work cutting tiles, laying them out with the spacers, and then attaching them to the walls with thinset mortar, the tile installation was complete! You can see now why we needed to move that outlet on the left up, and our drywall patching of the previous outlet location. Having the tile spacers made getting nice even lines with the wider 1/4” spacing much easier, and we weren’t worried about any possible vertical sagging with the thinset mortar because the wedges held the tiles very securely.
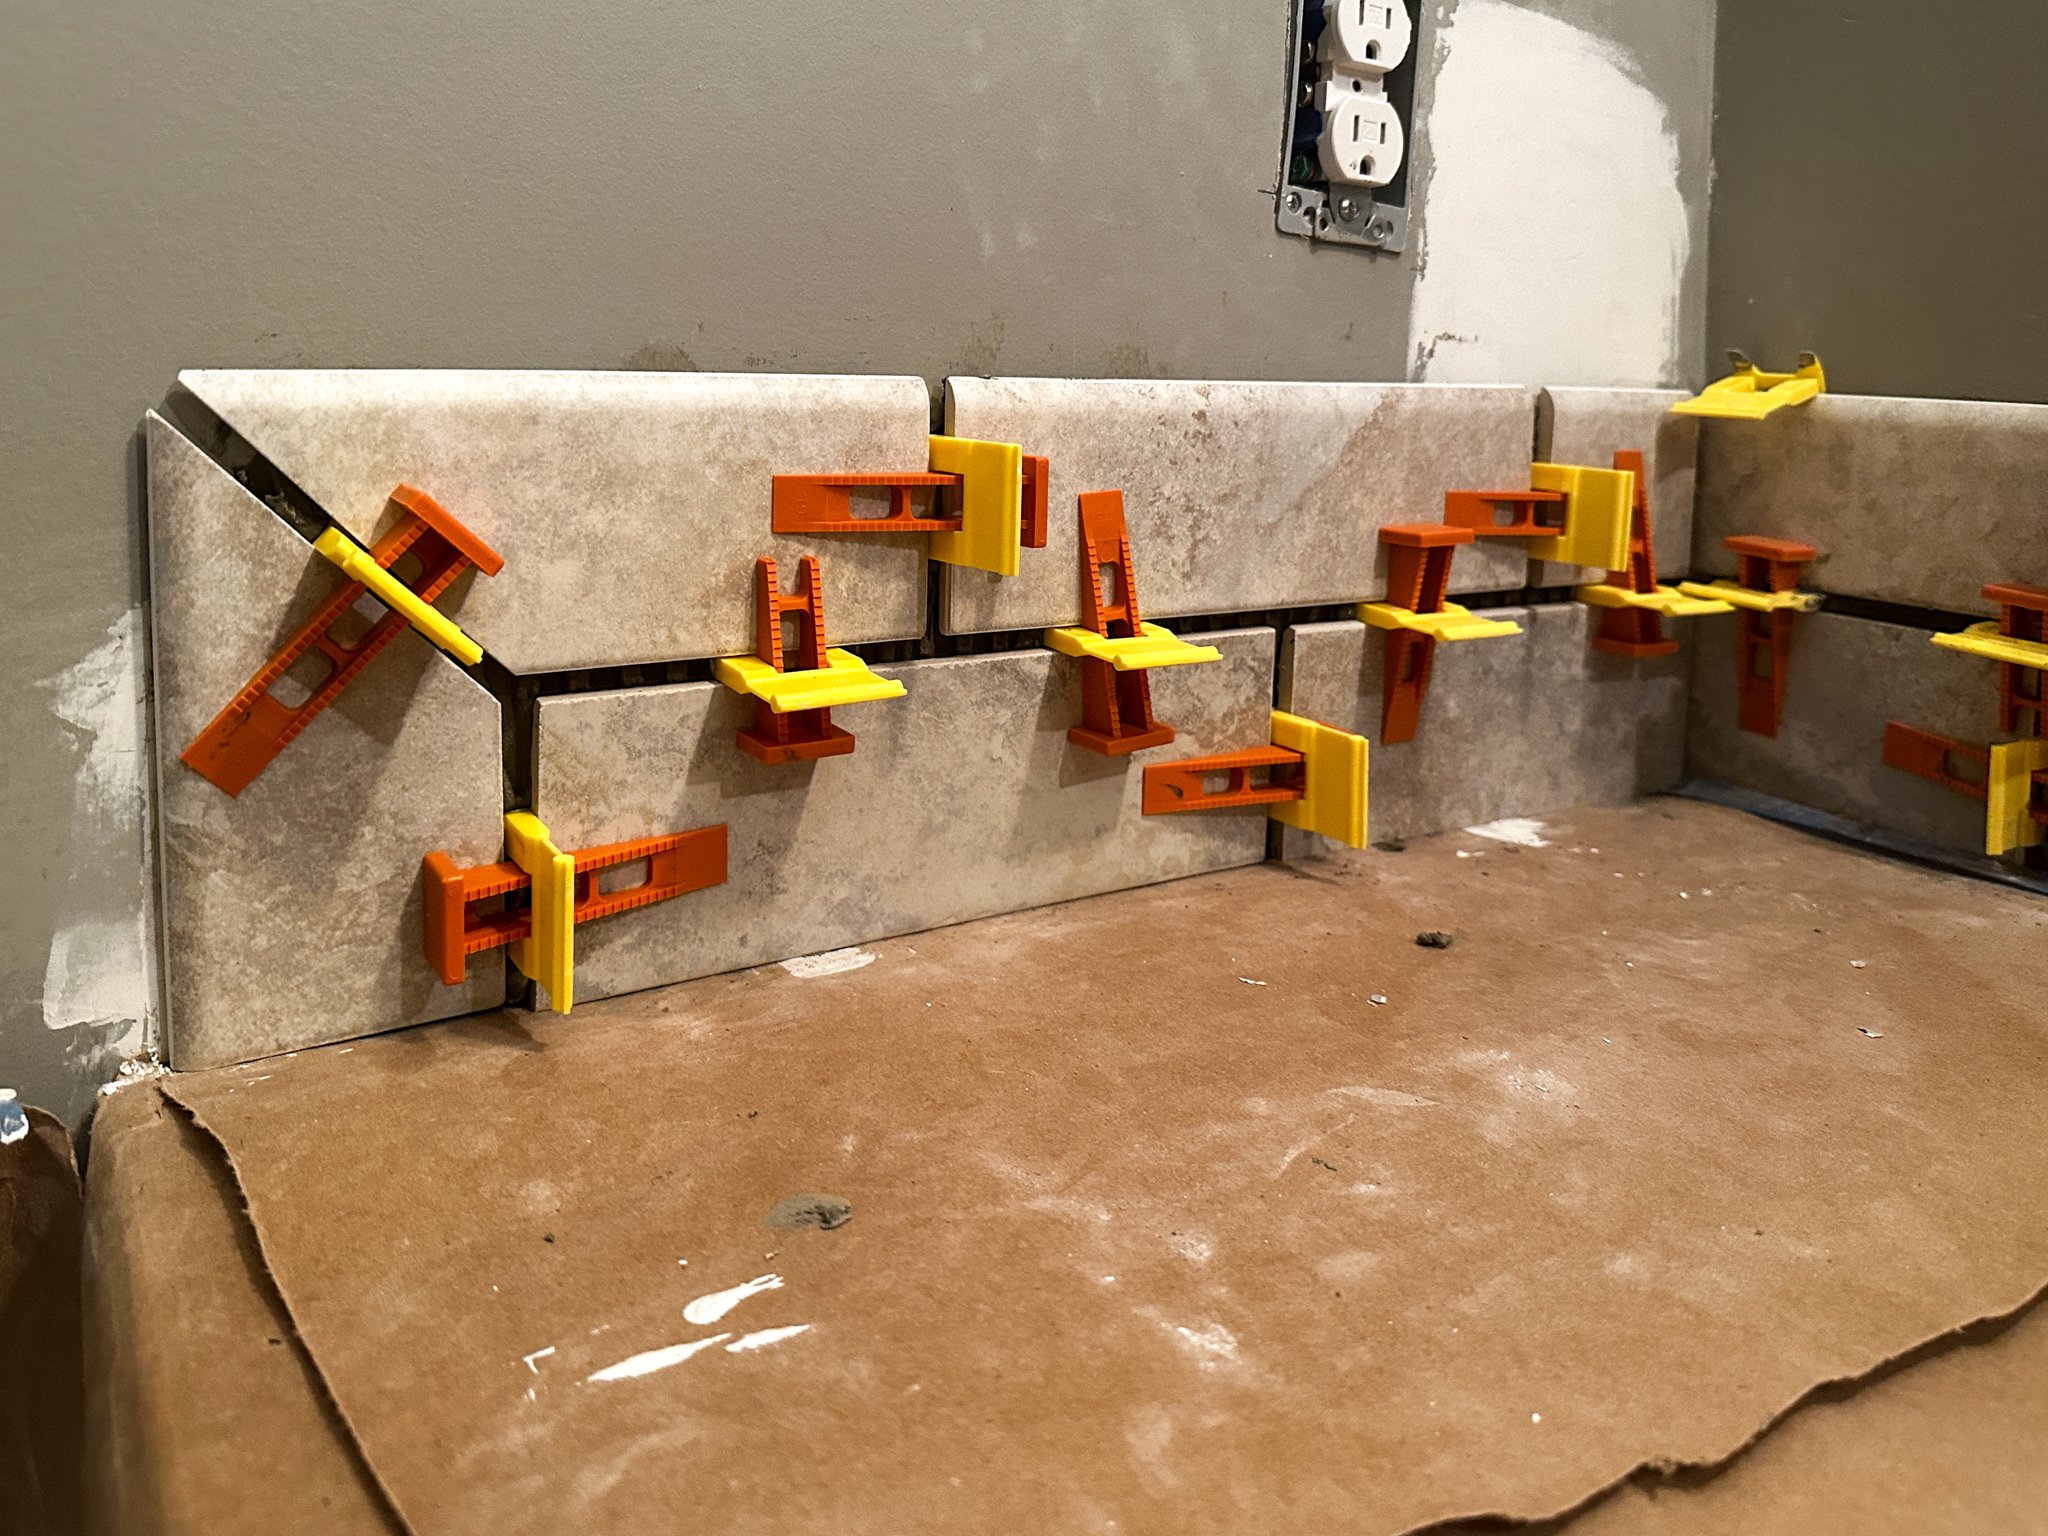
For ending the sidesplash on the left side of the counter, we decided to use the bullnose tile on the left side as well, with a 45 degree angle between the two pieces of bullnose. There’s a similar pattern on the top of the short wall, so we liked reusing that design element. These pieces were cut at the very end, just because we wanted to be sure everything lined up after starting the tile placement on the other side of the counter. This digital angle finder (affiliate link) helped a ton for getting that angle marked on the tile.
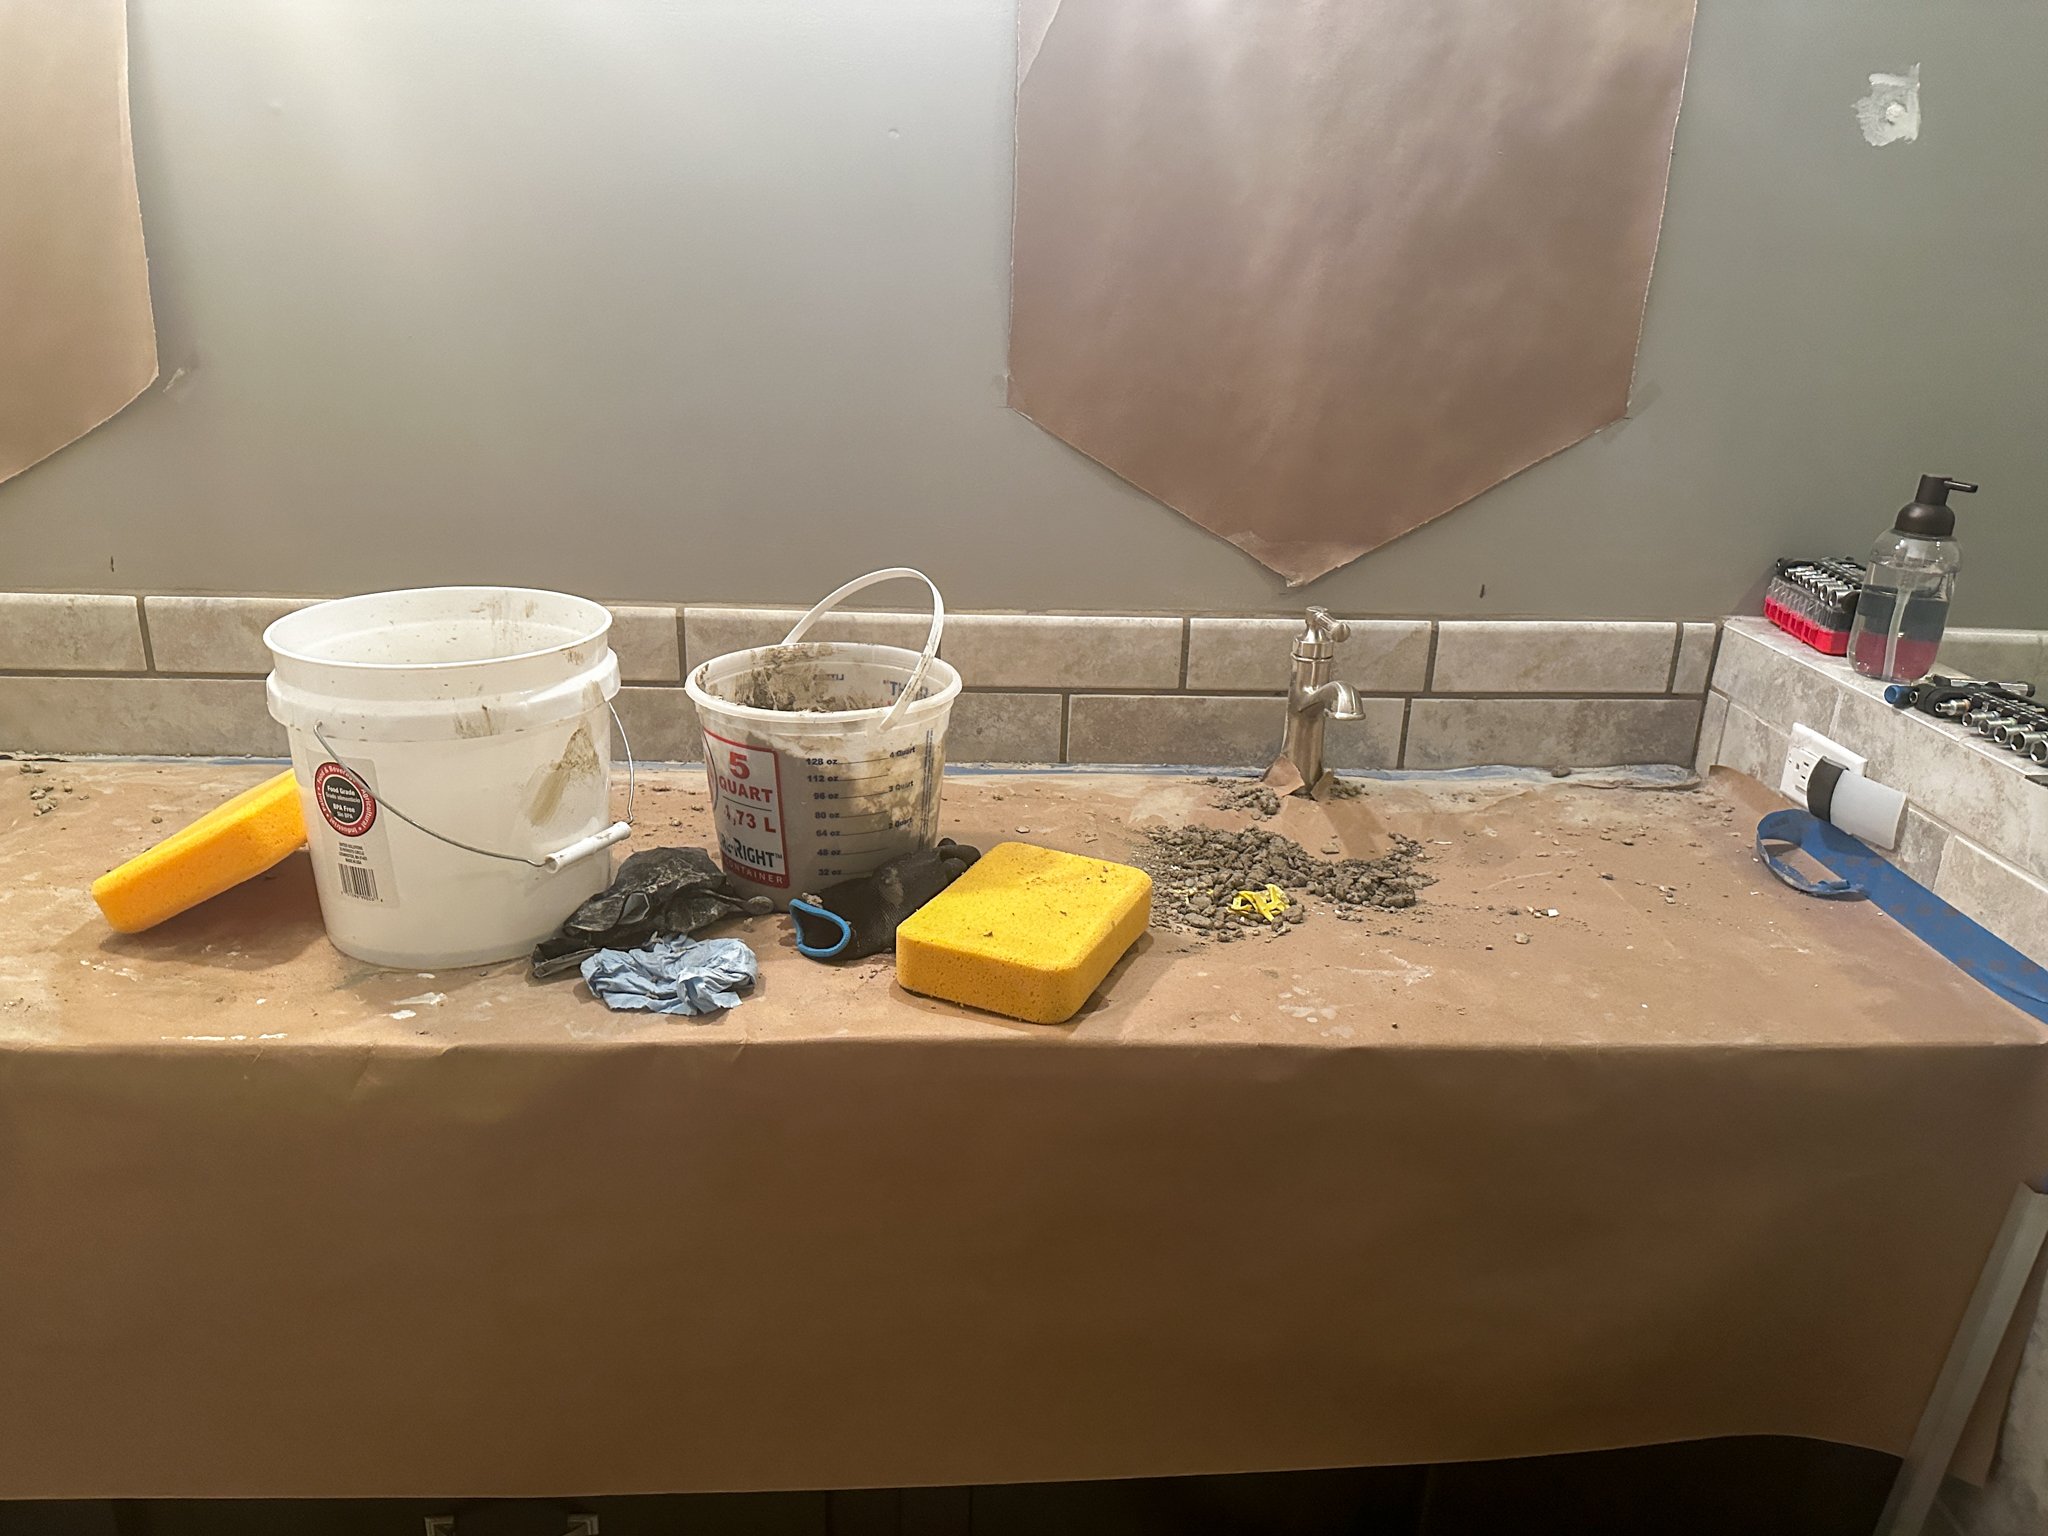
The next day, it was time to grout! A couple weeks ago, I had gotten this grout color sample kit to see what matched the existing grout best. Oyster Grey looked like our closest match, and we went with a sanded grout because of the wide tile spacing. After the thinset mortar had set up, we used a rubber mallet to break off the portion of the spacers sticking out of the tile, along with the wedges which are fully reusable. Then, we cleaned up any thinset that had ended up on top of the tiles, or built up too much in the gaps between the tiles. We had some hurdles when it came to actually applying the grout, since as tile newbies, we didn’t realize that the clumps in the grout were possibly a sign of an issue with the grout powder. However, we got it into the tile gaps and did lots of tooling of the joints to make sure they were smooth and even, and we’ll be crossing our fingers for no issues cropping up once the grout is fully cured.
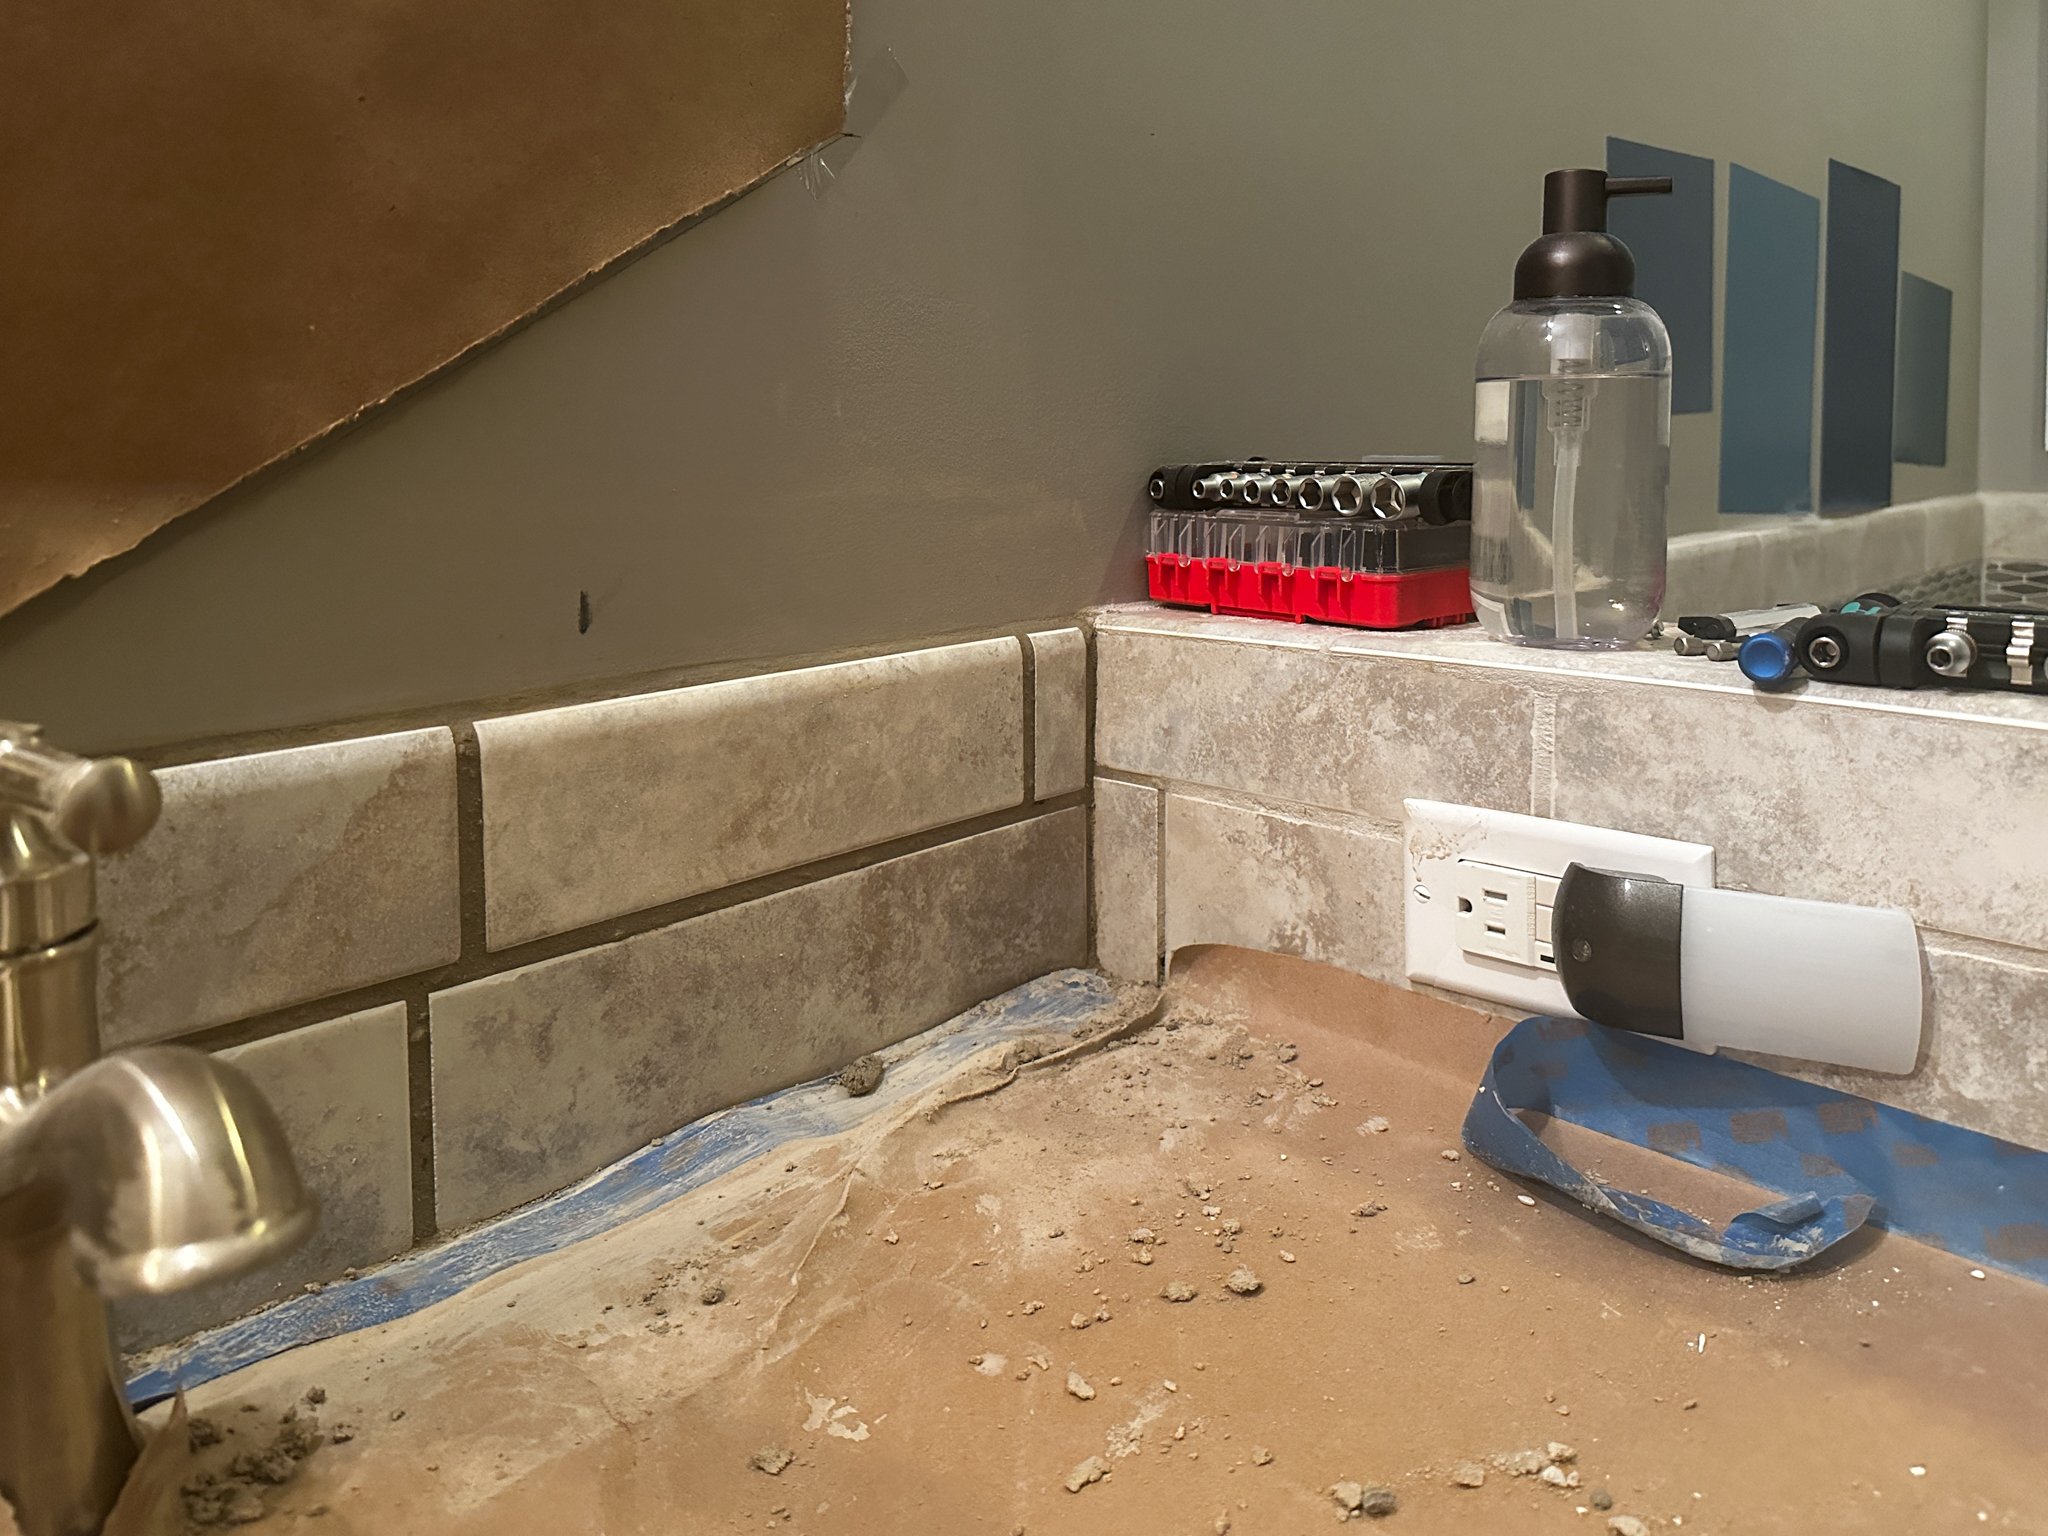
Because of where the original backsplash sat, we actually had to replace one tile on the short wall as well. That small tile in the bottom left of the wall was cut to size, and I have to say that once the grout cures, I think it’ll look like it’s been there all along.
You can also see how the height of the backsplash matches not just the short wall, but also the tile surrounding the garden tub on the other side of that wall. I think this will make the bathroom updates feel very cohesive with the rest of the space despite only doing a partial renovation.
After 72 hours have passed, if the grout is holding up, we’ll go ahead and seal it. I am pretty proud of our first tiling attempt, and I also have so much respect for people who do this professionally or DIY on much larger spaces!
