

Hey there, DIY enthusiasts and party-planners!
We’re revving up to share with you three fast and furious DIY projects that will take your racecar-themed toddler birthday party to the next gear. So, buckle up and get ready to put the pedal to the metal!
This page contains affiliate links. When you purchase through these links, I may earn a small commission at no cost to you. These are items we used for creating décor for this racecar birthday party, and would use again for making event decorations.
What you Need
Let’s shift into gear and first talk about the tools and materials you’ll need for each project.
Cone and Flag Centerpieces
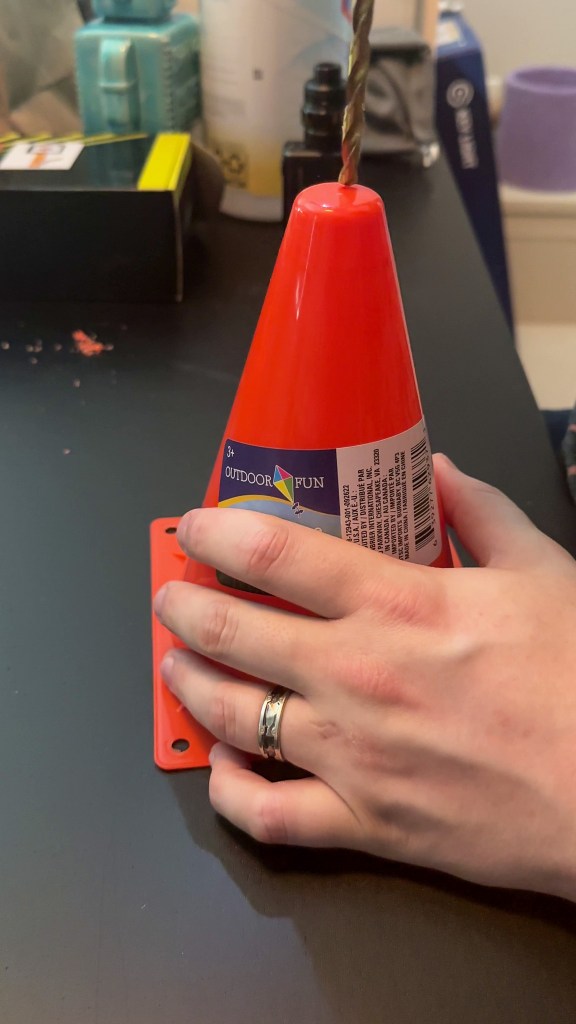
We’ll be drilling holes into plastic cones to hold racing flags for table decorations.
Make sure you have:
- Plastic cones
- Racing flags (affiliate link) – an even number, for this style of centerpiece
- A drill with a drill bit about the size of the handle of the flag
- Tape
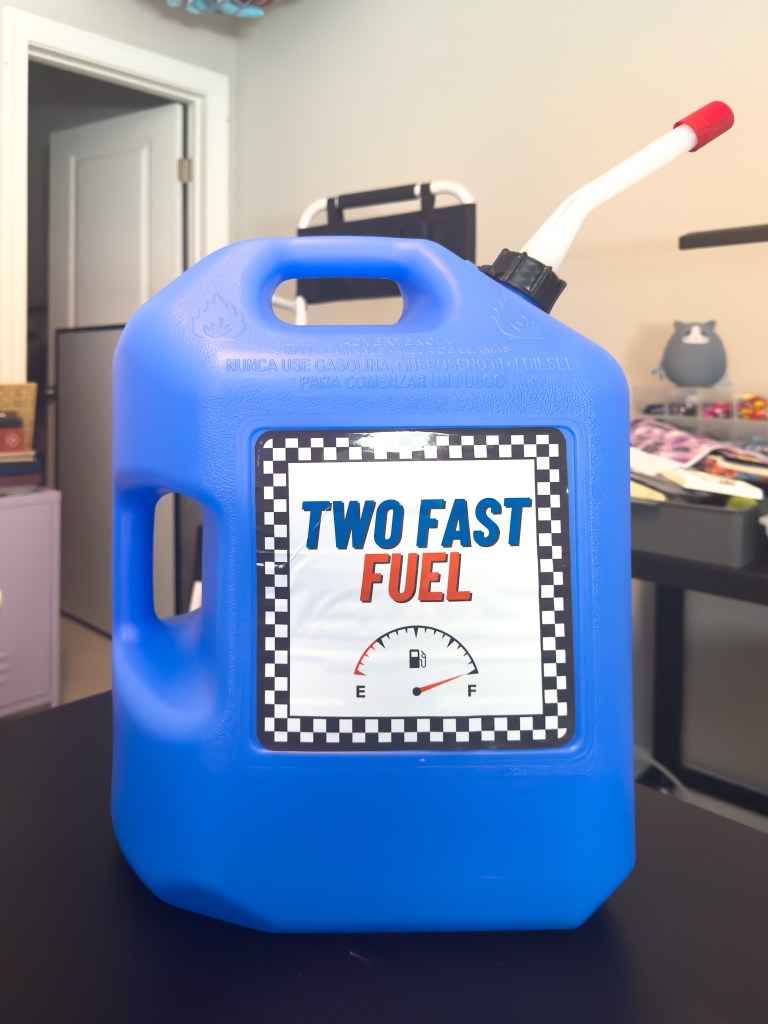
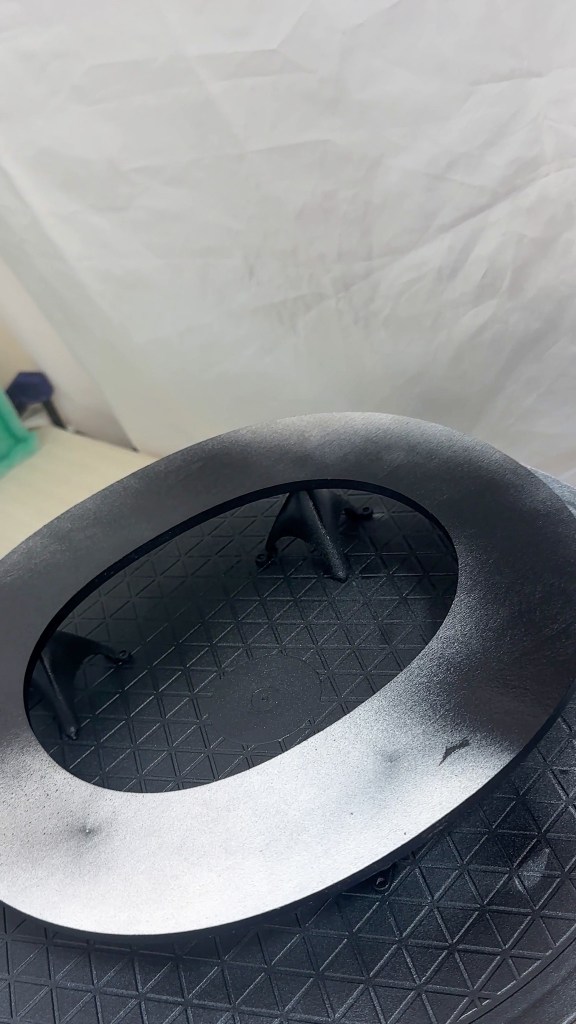
Customized Gas Can
When looking for racecar birthday party inspiration, we found a lot of pictures of gas cans as showstopper décor pieces. We are going to use a water jerry can but give it a decal that looks ready for the racetrack.
You’ll need:
- A plastic water jerry can (affiliate link)
- A color printer (ours is an inkjet)
- Printable vinyl decal paper (affiliate link) for your printer type
- Scissors
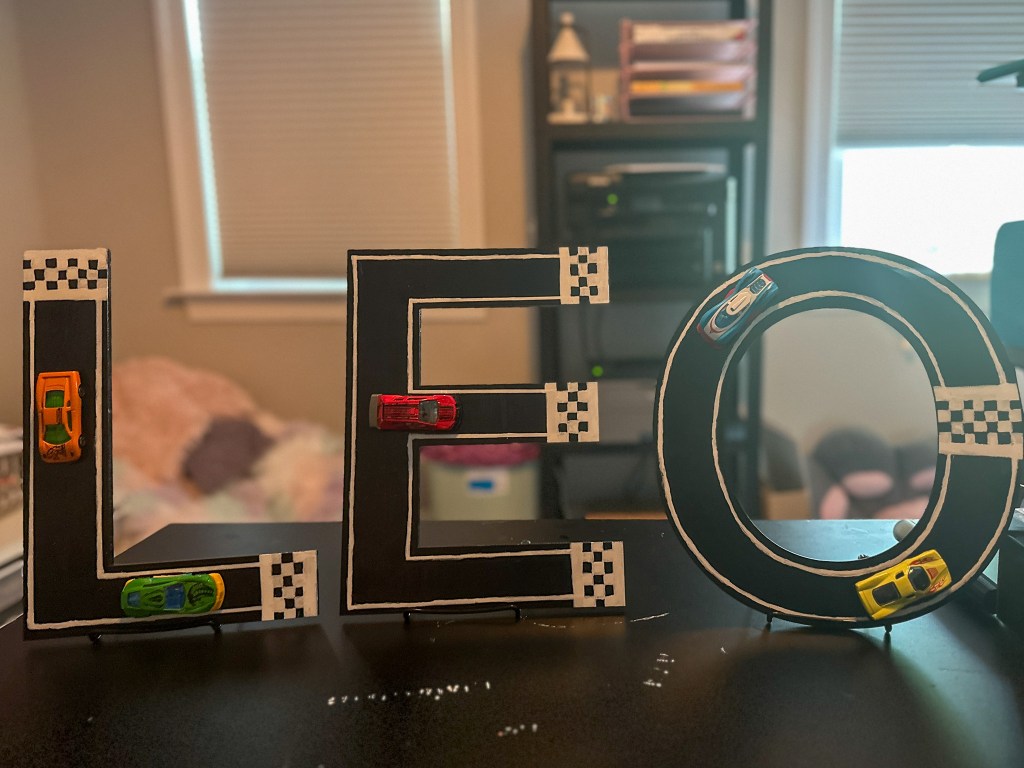
RaceTrack Name Sign
Our final DIY is a sign with the birthday boy’s name, designed to look like a racetrack complete with cars.
Your pit crew will require:
- Wooden letters (affiliate link) at least 12 inches tall
- Black spray paint
- Spray primer if your spray paint isn’t an all-in-one
- Black and white paint pens (affiliate link)
- Toy cars
- Glue (we used a hot glue gun)
Instructions
Now, let’s dive into the step-by-step instructions.
Cone and Flag Centerpieces
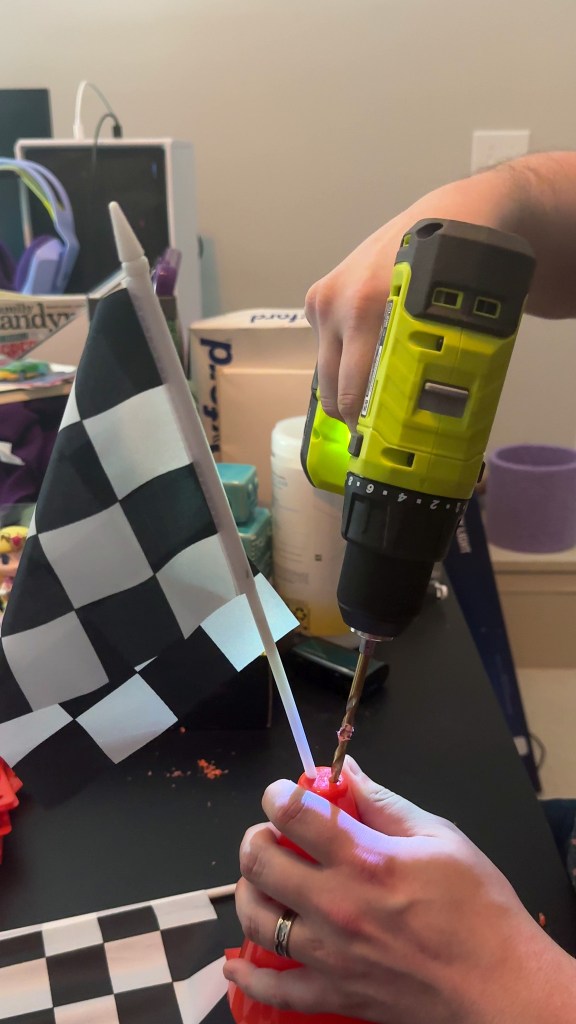
- You’ll need to drill two holes, one to each side of the center of the top of the cone.
- Start drilling with the drill straight up and down to get the hole started.
- Angle the drill as you keep drilling so that the flag will go off at an angle once it is inserted into the cone.
- Clean up any plastic shavings left around the top of the cone.
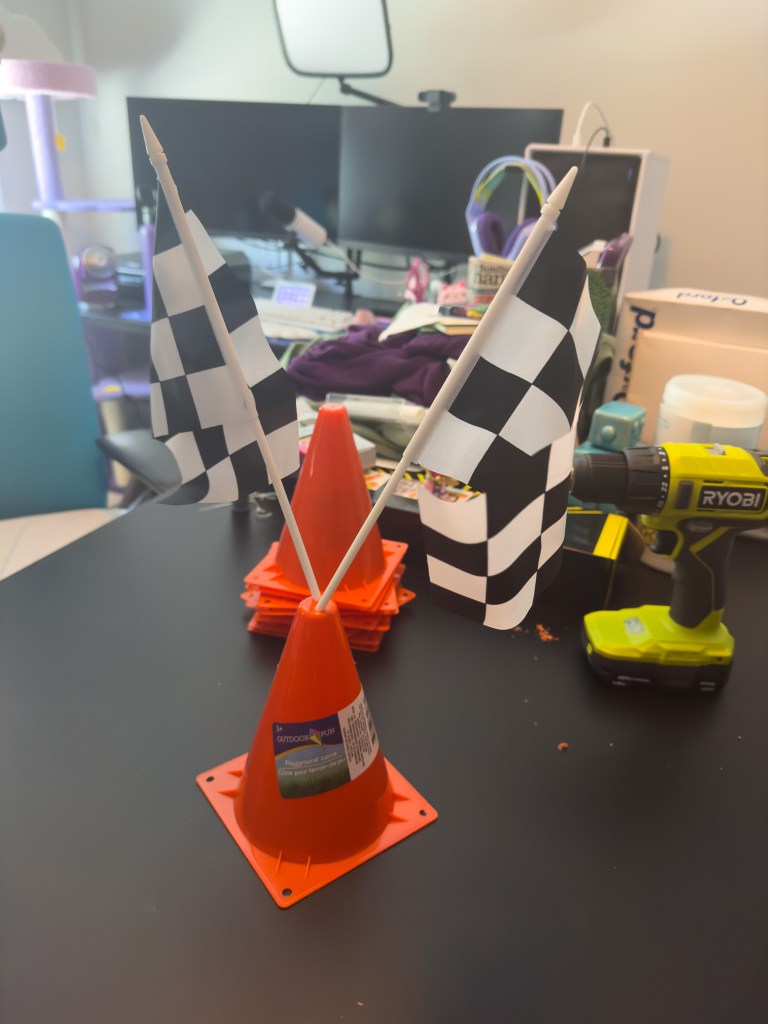
- Insert two flags into the cone.
- Reach into the cone and tape the bottom of the flags to the inside of the cone, so they stay in place throughout the party.
Customized Gas Can
- Measure the areas of the jerry can that you want to put labels on.
- Design a label to be that size, placed on an 8-1/2″ by 11″ document. We used Canva, which has lots of great fonts and racecar-themed graphics. If you’d like to use ours, it’s available as a template at this link.
- Print your labels onto the vinyl. If you are also using an inkjet printer, give the labels lots of time to dry before going to the next step.
- Cut the labels out with scissors.
- Remove any labels that came on the can that you don’t want.
- Attach your new labels to the can, moving slowly and smoothing the label as much as you can.
- Our can came with the spout on the inside, so we flipped it around using the cap.
RaceTrack Name Sign
- If you are using a spray paint without a primer, prime the letters.
- Spray paint both sides of the letters black, making sure to get the edges. It took us two coats per side.
- Once the letters dry fully (we waited overnight), draw your road lines and checkered finish lines onto the letters with a white paint pen. You can use a black paint pen for any touchup.
- Glue toy race cars onto the letters for the finishing touch.
Putting your own spin on it
Just follow the turns and twists, and you’ll be track-ready in no time. And if you want to add some personal flair to your projects, don’t be afraid to race off the beaten track. You could paint a checkerboard pattern on your cones, design a custom decal that says “Happy Birthday, Little Racer!”, or add painted flames to your wooden letters for some extra hot-rodding style.
Wrap-Up
So, there you have it – our three DIY projects that will make your racecar-themed toddler birthday party a winner. And if you have any other fun racecar birthday party DIY ideas, we’d love to hear them in the comments below. Remember, it’s not just about speed, but about enjoying the ride. And with these DIY projects, your guests will be sure to have a blast at the party track!
