
Introduction
Picture this – it’s a dark October night, and a cool autumn breeze rustles through the trees. As you walk down the path, your heart skips a beat as you spot ominous gravestones in your yard, looking like they’ve been guarding souls for centuries. In this post, we’ll show you how to bring your outdoor space to life, or maybe undeath, by turning foam gravestones into realistic stone Halloween décor. Get ready to scare your neighbors and add that perfect touch of eerie ambiance to your home this Halloween!
Affiliate Disclosure: This article contains affiliate links. If you make a purchase through these links, we may earn a small commission at no additional cost to you. We only recommend products we genuinely love and believe will enhance your DIY experience.
Materials and Tools
Before we dive into the transformation process, let’s make sure you have everything you need. Here’s the list of materials and tools we used on our foam gravestone makeover project:
Foam Gravestone Decorations
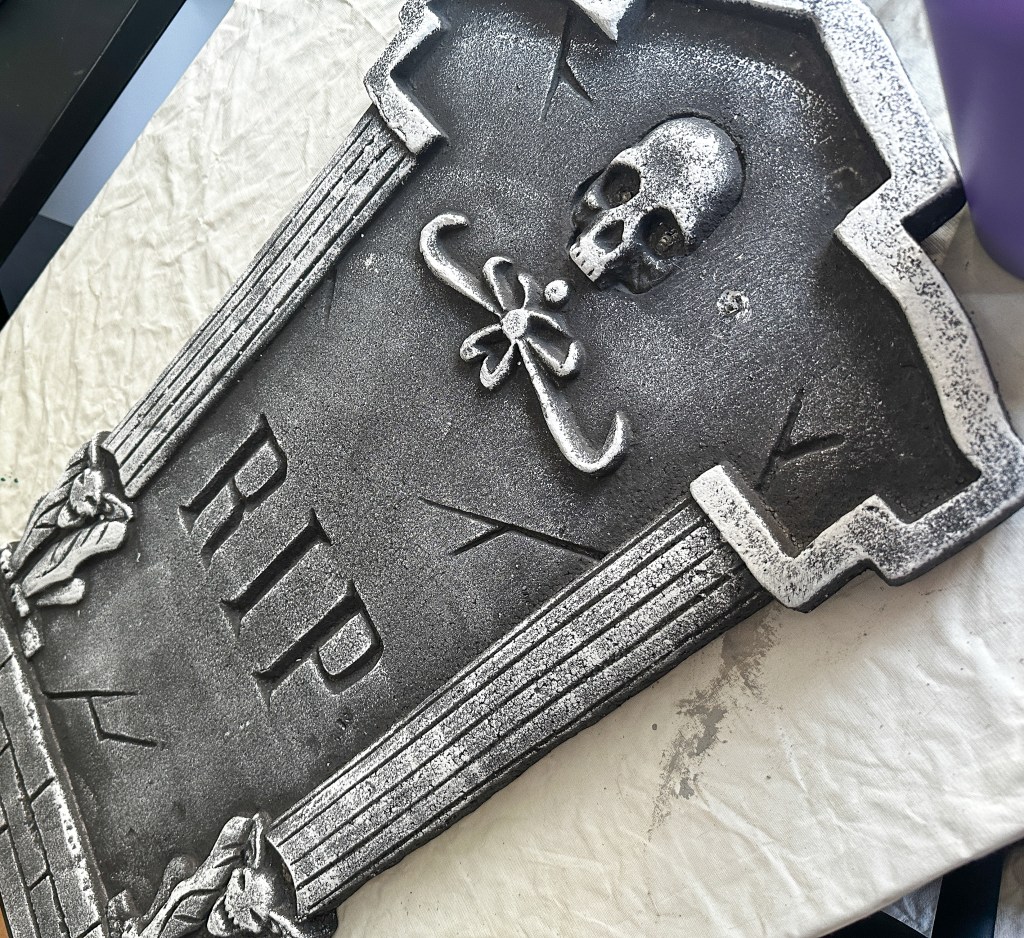
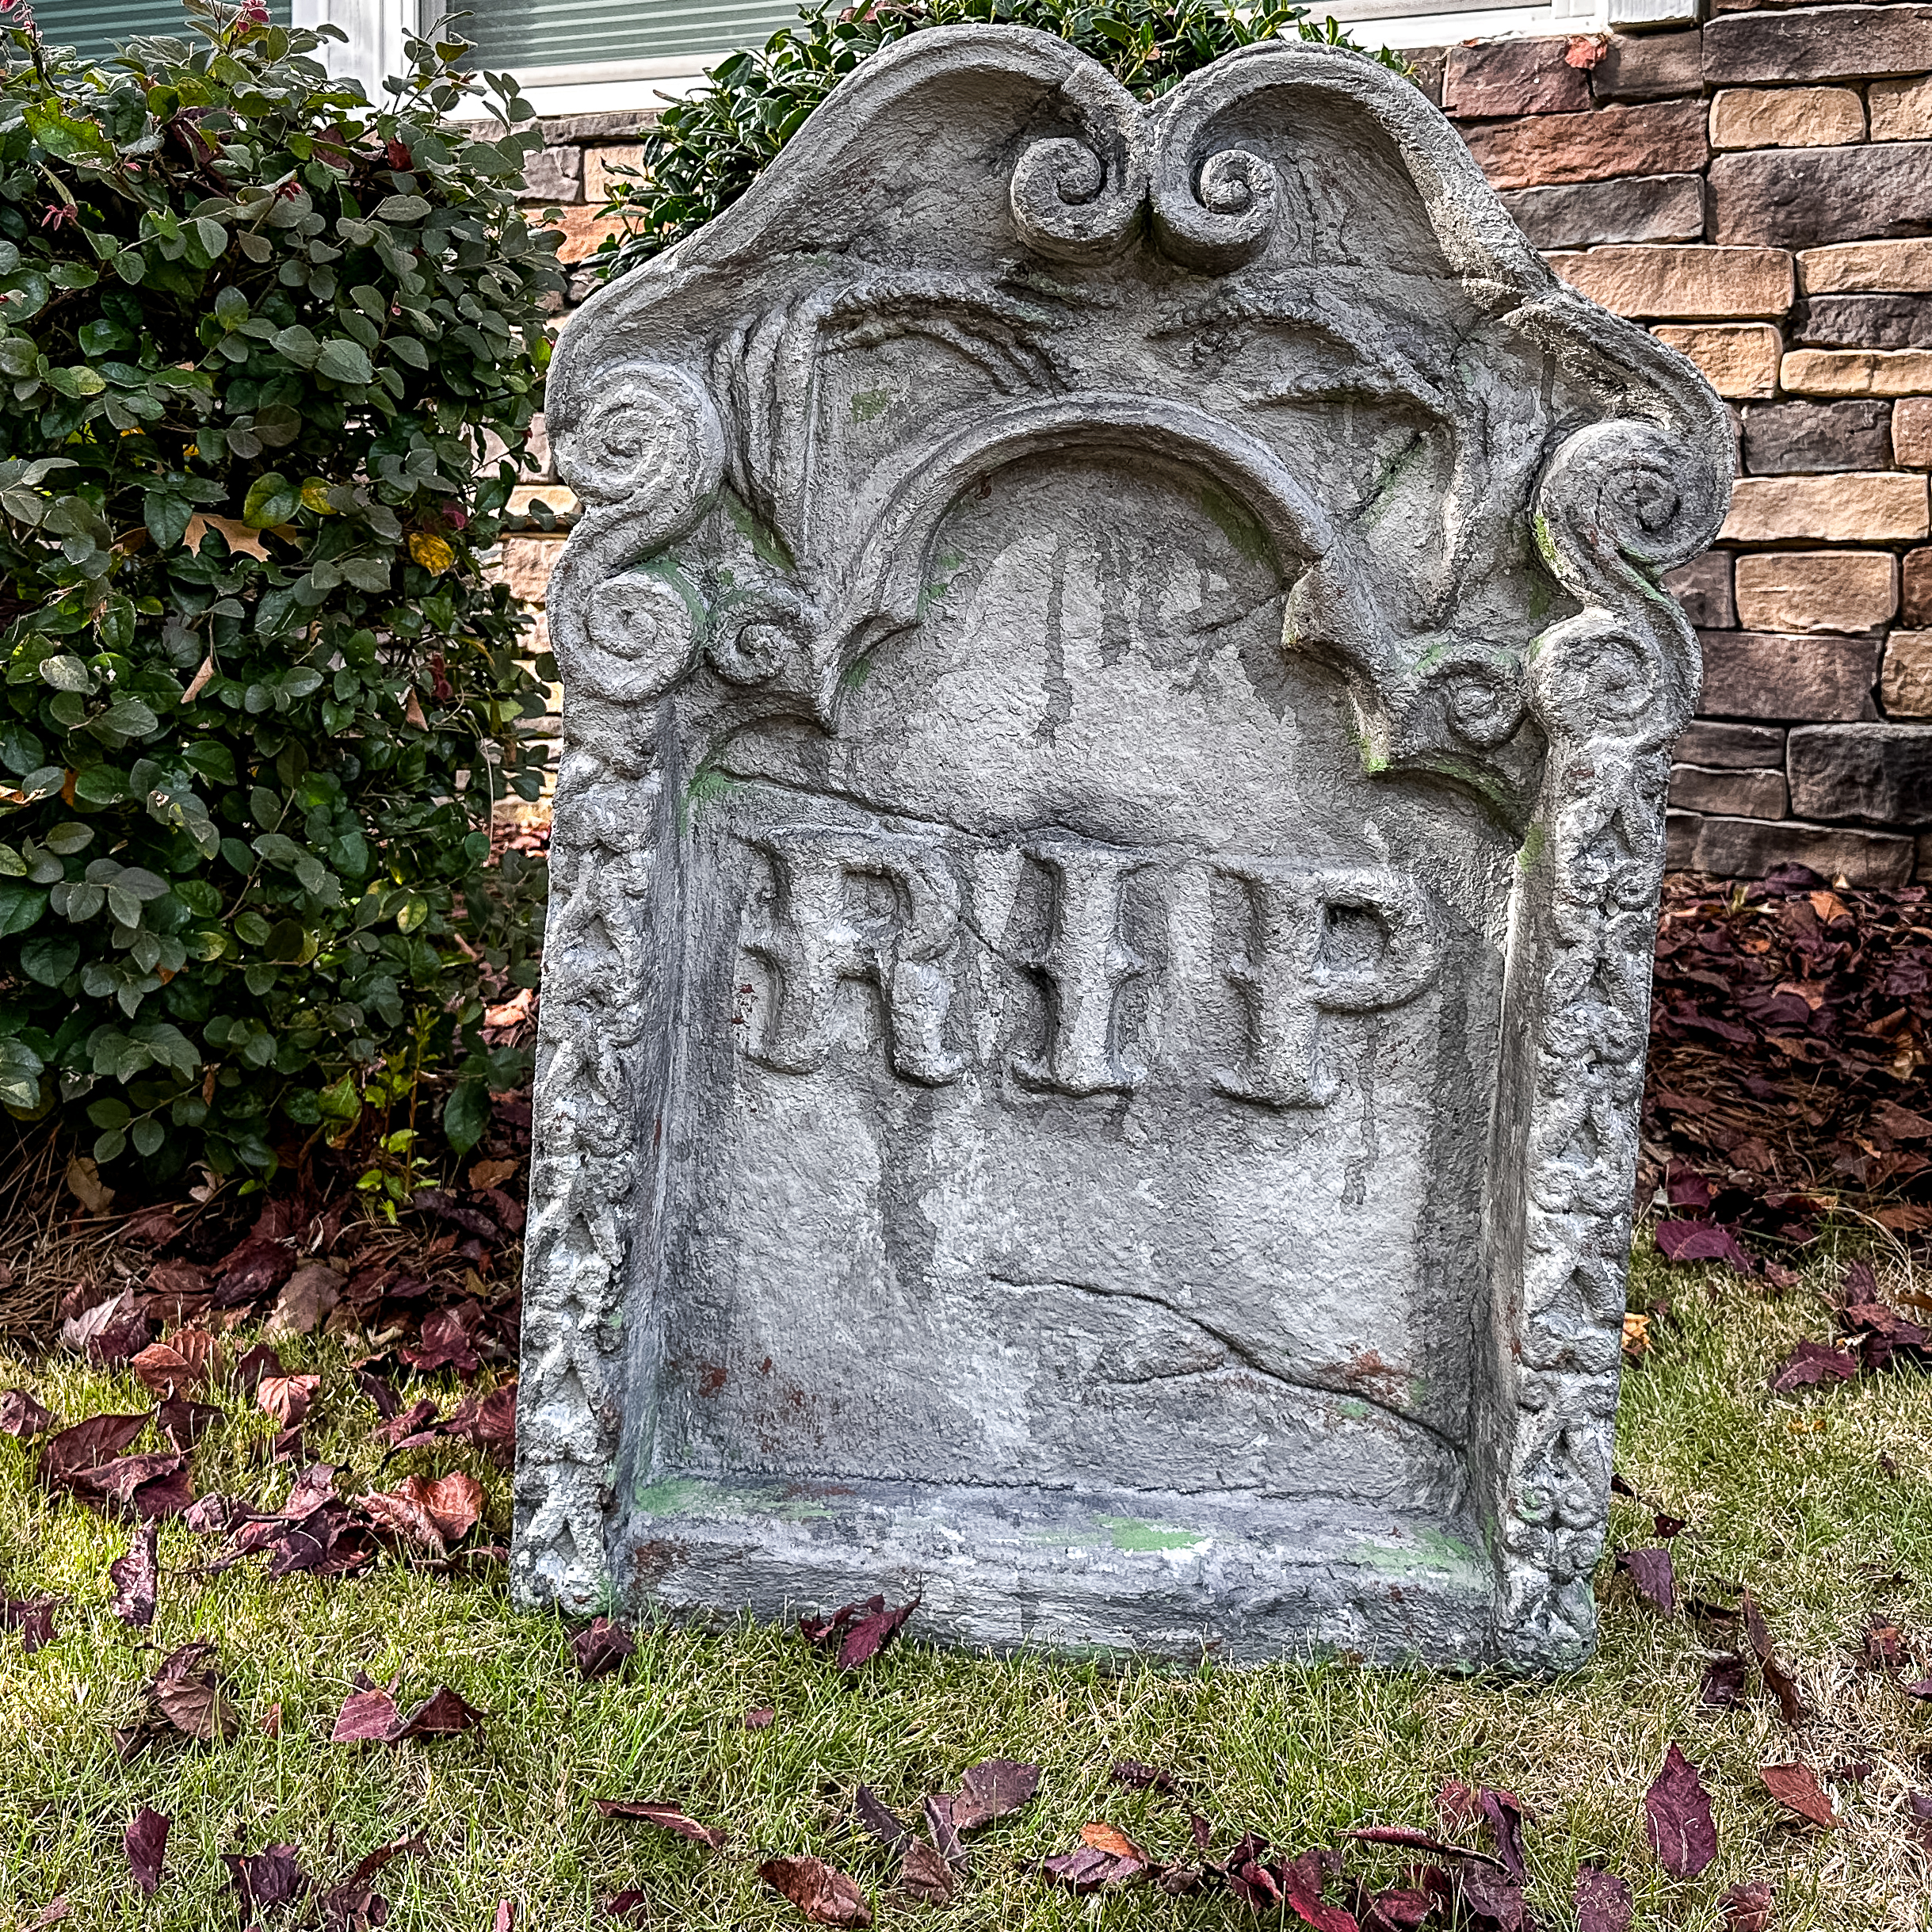
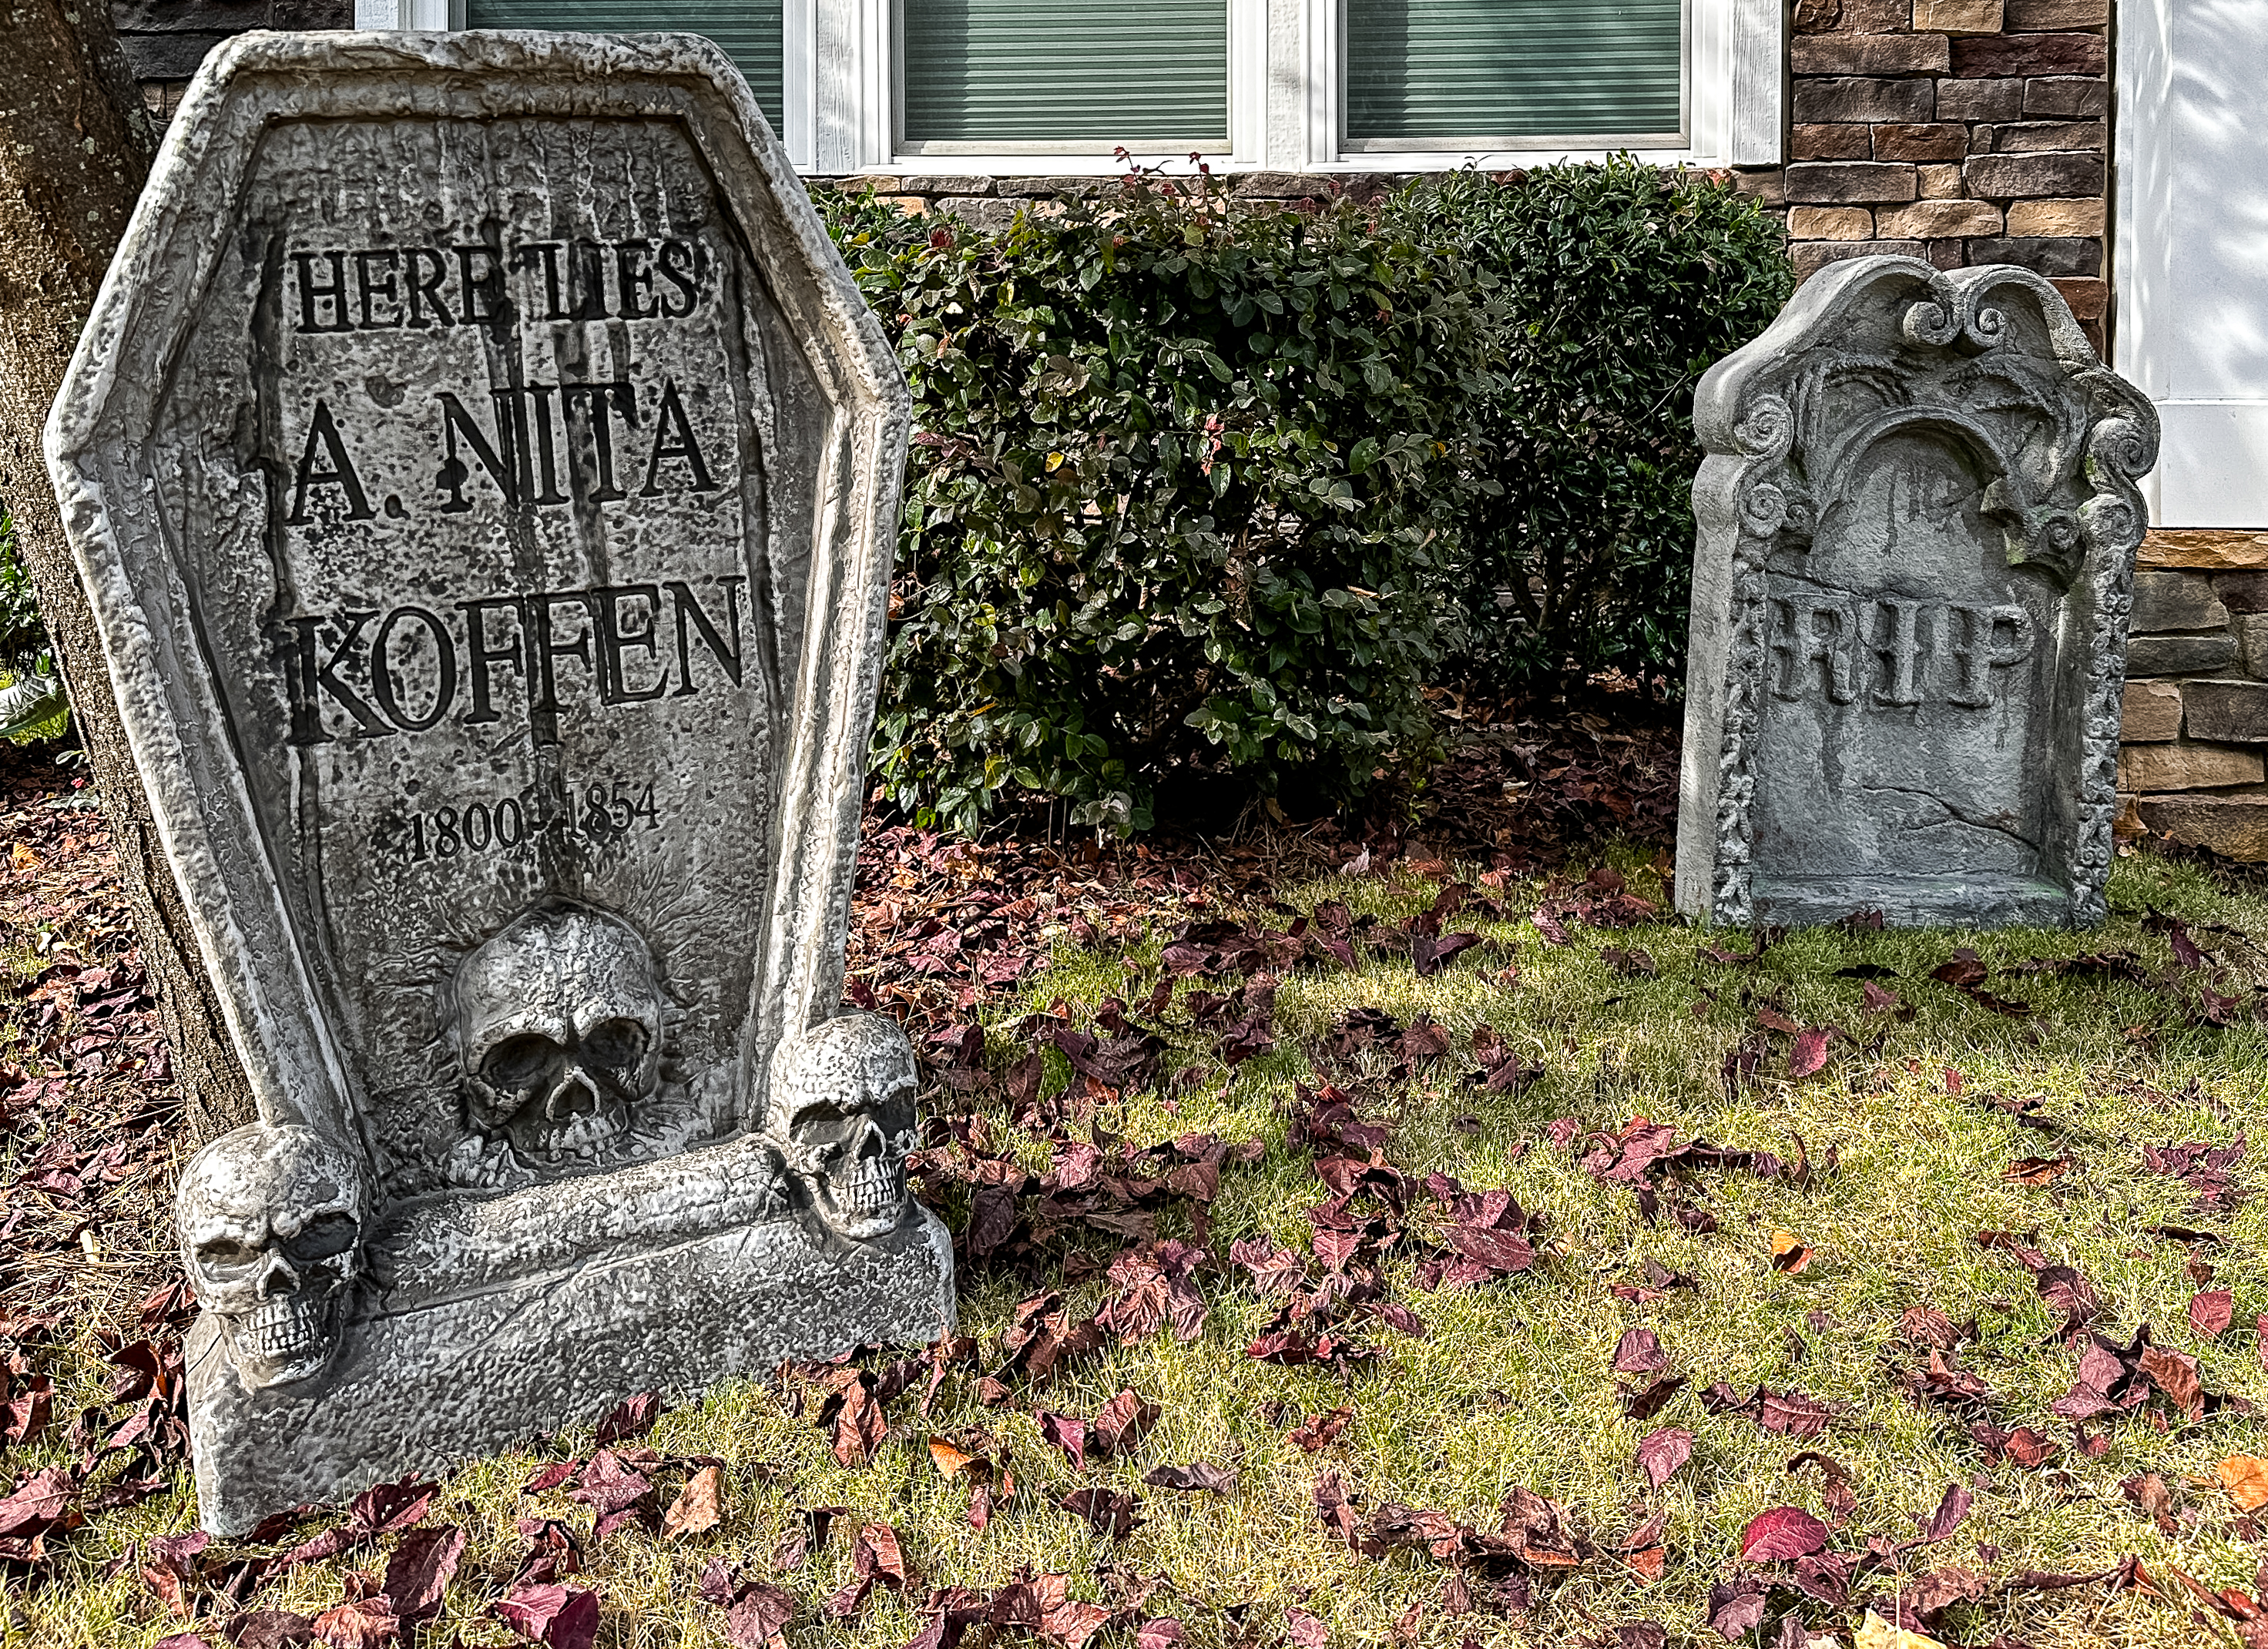
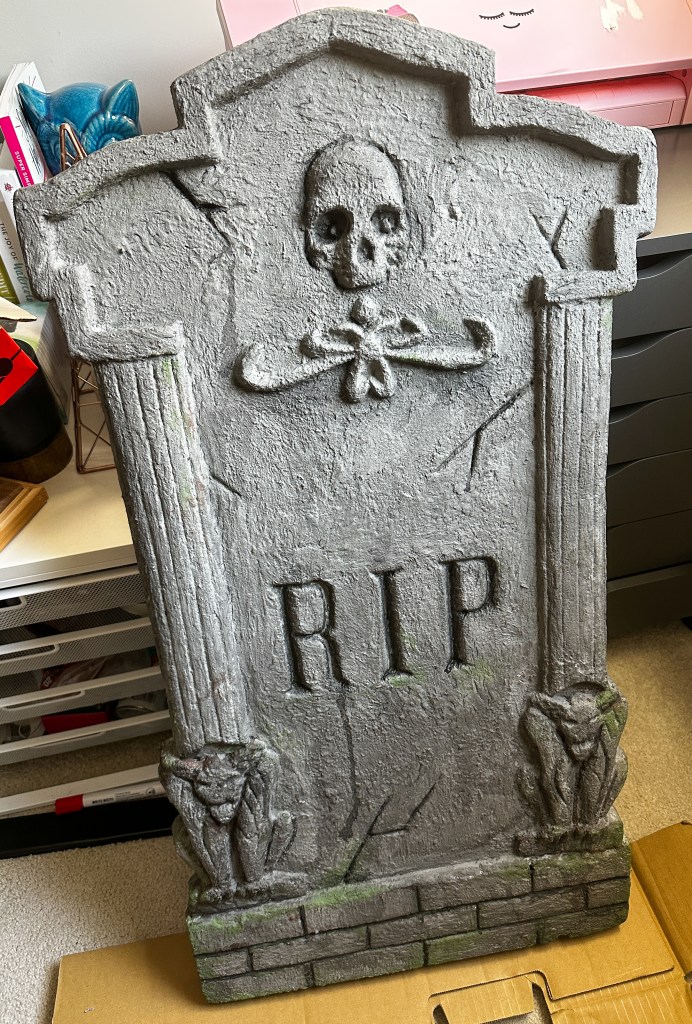
We searched a lot of different online stores to find foam gravestones that would be a good base. We found the one on the left at Oriental Trading Company and the one on the right at Amazon (affiliate link). The main things we were looking for were a good size and details that we liked.
Drylok

The key part of making these foam gravestones look more realistic and also last more than one Halloween is Drylok (affiliate link). We used about 1/3 of a gallon on each gravestone, so you may need more or less depending on how many you are updating.
Paint Brushes
We used various foam brushes and craft paint brushes for the acrylic paint. For the Drylok, we got a wide chip brush, because we wanted a lot of texture left in the Drylok and chip brushes are meant for one-time uses like this where cleaning out the material is very difficult.
Acrylic paint
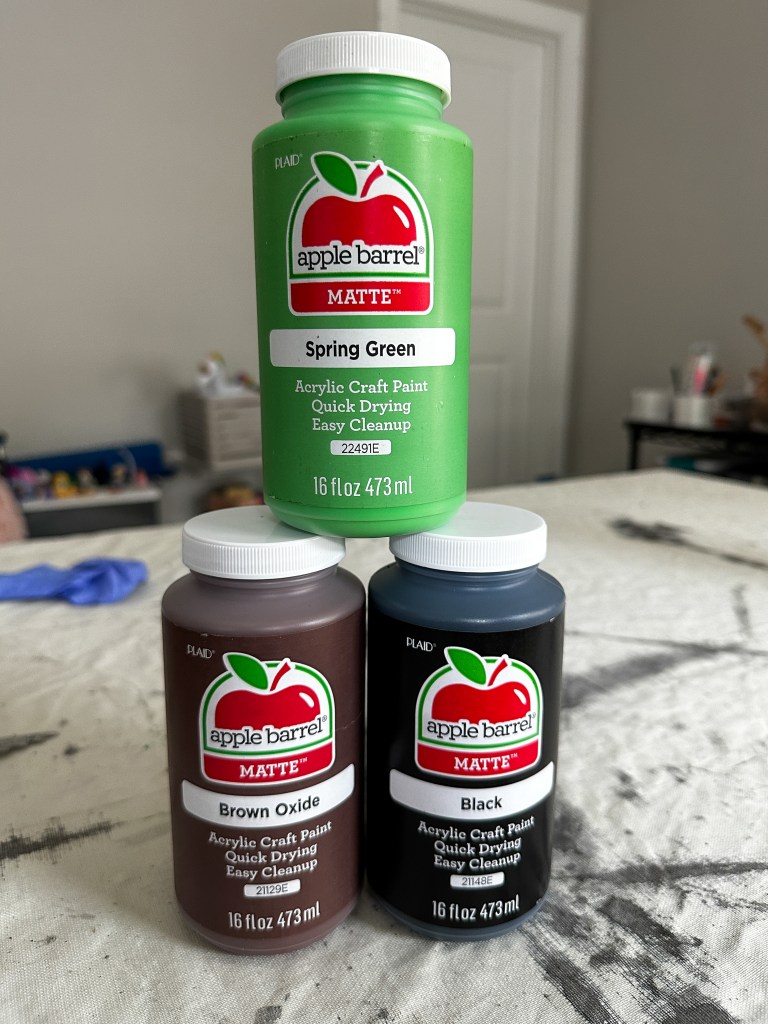
To complete the realistic update, we need acrylic paint for adding color and weathered effects.
We used Apple Barrel Matte Acrylic Paint (affiliate link) in these three colors. By diluting the paint for some treatments and mixing the colors for others, we were able to get the full range of what we needed for this project.
Mounting hardware

Because the gravestones are still foam on the inside, they are pretty lightweight, so we needed to attach the gravestones securely to the ground.
For each gravestone, we had four of the following:
- Rubberized 3/4″ cable clamp (affiliate link)
- Drywall anchor, cut to be less than the thickness of the gravestone
- A screw shorter than the thickness of the gravestone
- A washer larger than the holes in the cable clamp
We also had two metal poles for each gravestone.
Preparing the Gravestones
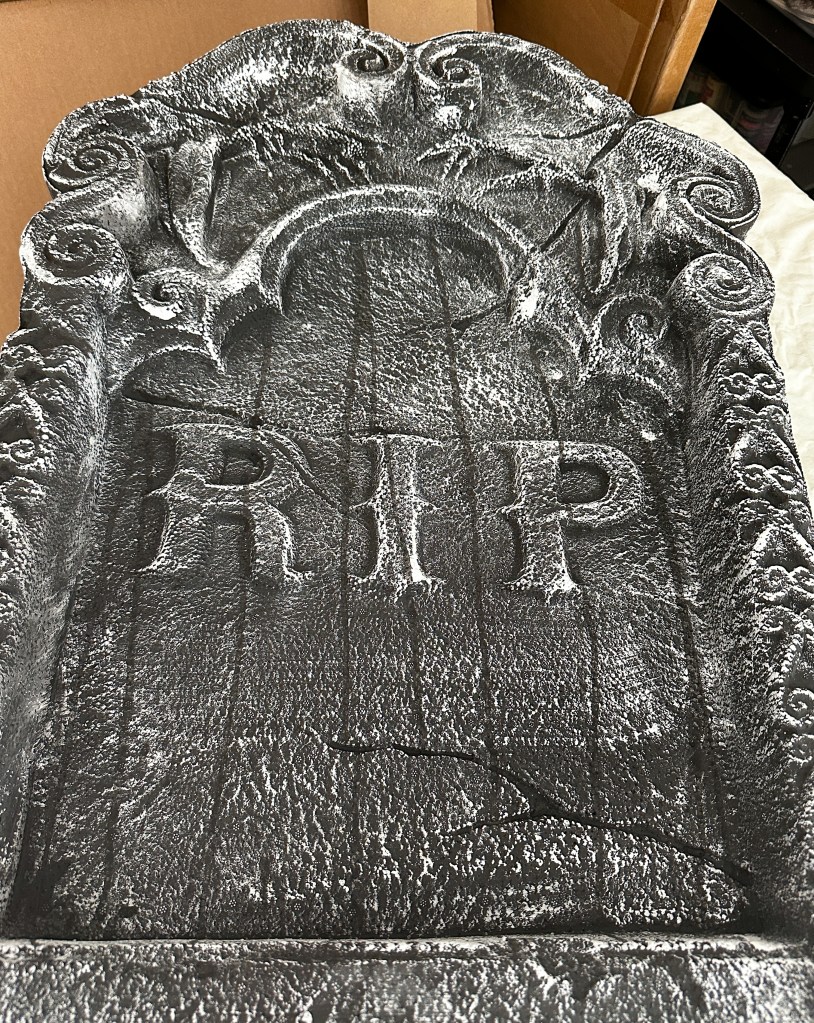
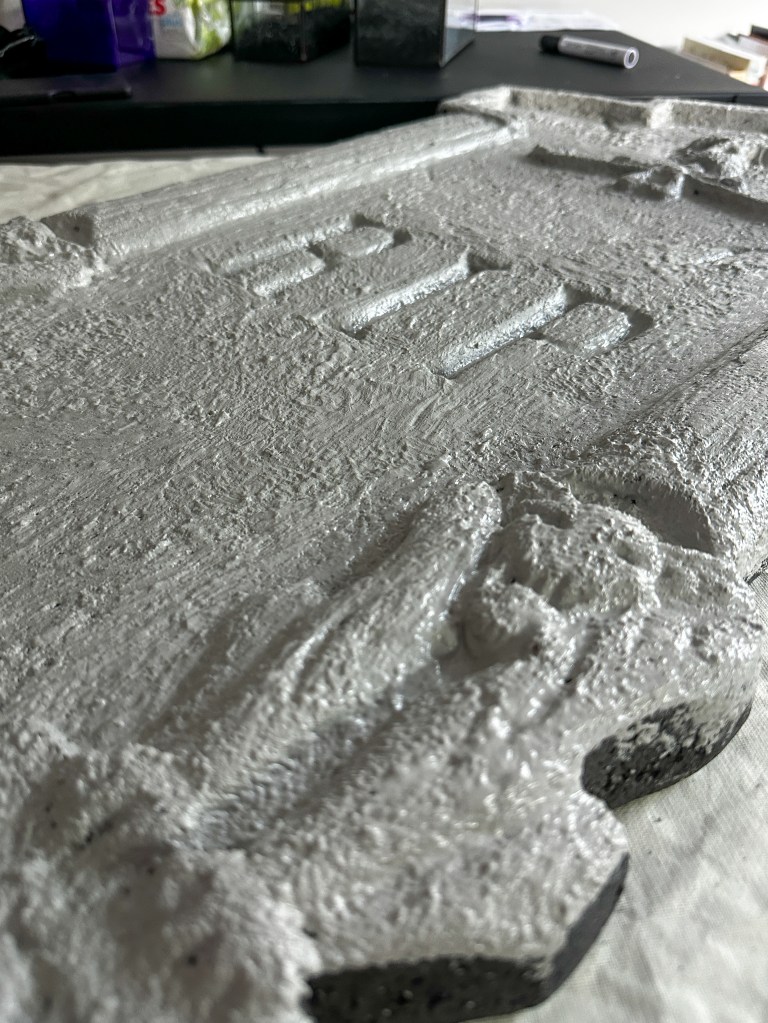
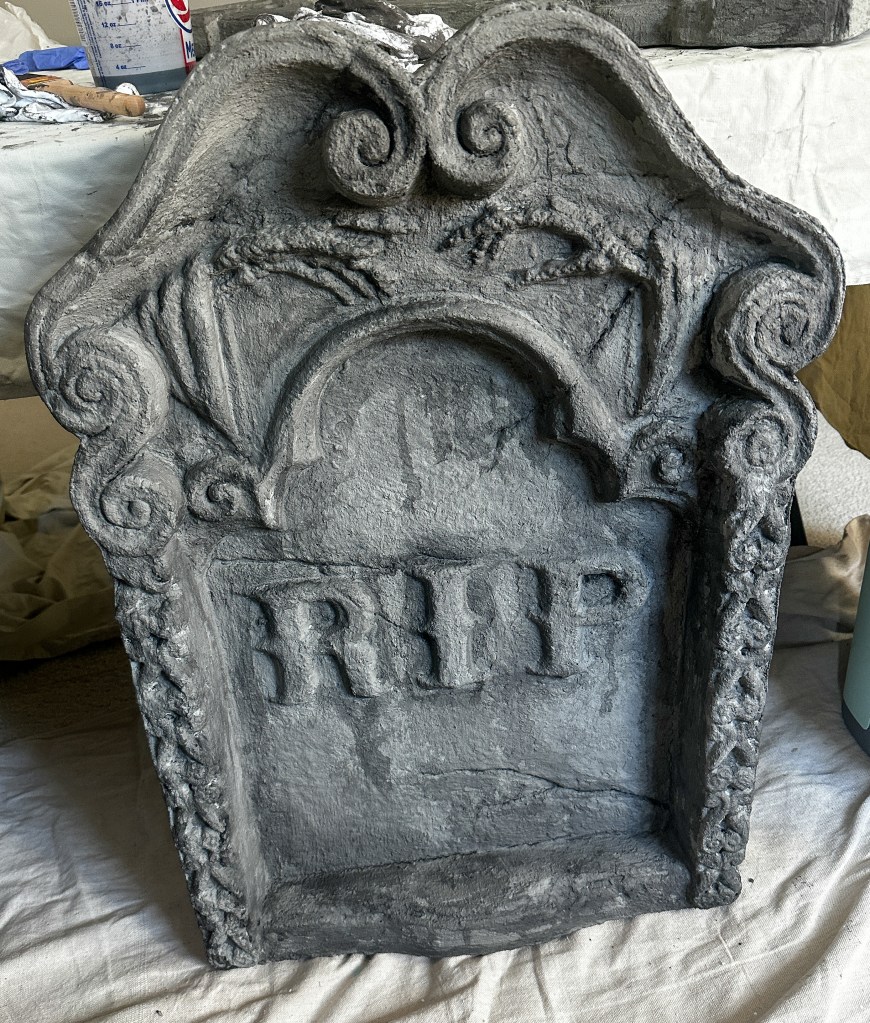
To create a realistic appearance, we’ll first need to prepare the foam gravestones. Start by applying Drylok to the surface of the gravestones. Drylok is normally used for waterproofing masonry like cinderblocks, so it has a gritty texture and is very resistant to the elements. This step not only adds texture but also makes the gravestones much more durable, ensuring they withstand any ghouls and monsters that Halloween might bring.

Here are a few tips to make the application process smooth and consistent:
- Begin with a clean, dry surface. Wipe down the gravestones to remove any dust or debris.
- Shake the Drylok container well before opening.
- Using a brush, apply the Drylok in thin, even coats. This helps prevent losing the detail on the foam gravestone under clumps of Drylok.
- Allow each coat to dry completely before applying the next one. Aim for at least two coats, but feel free to add more if desired.
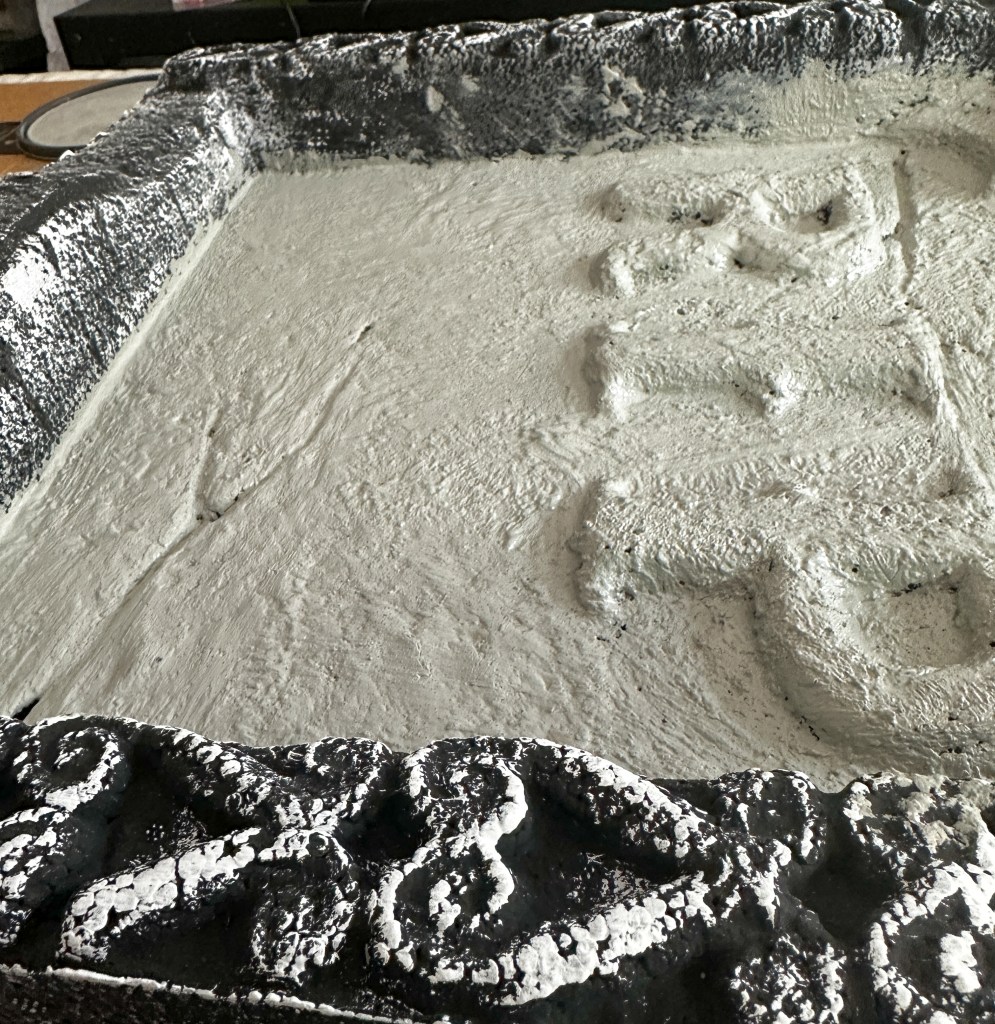
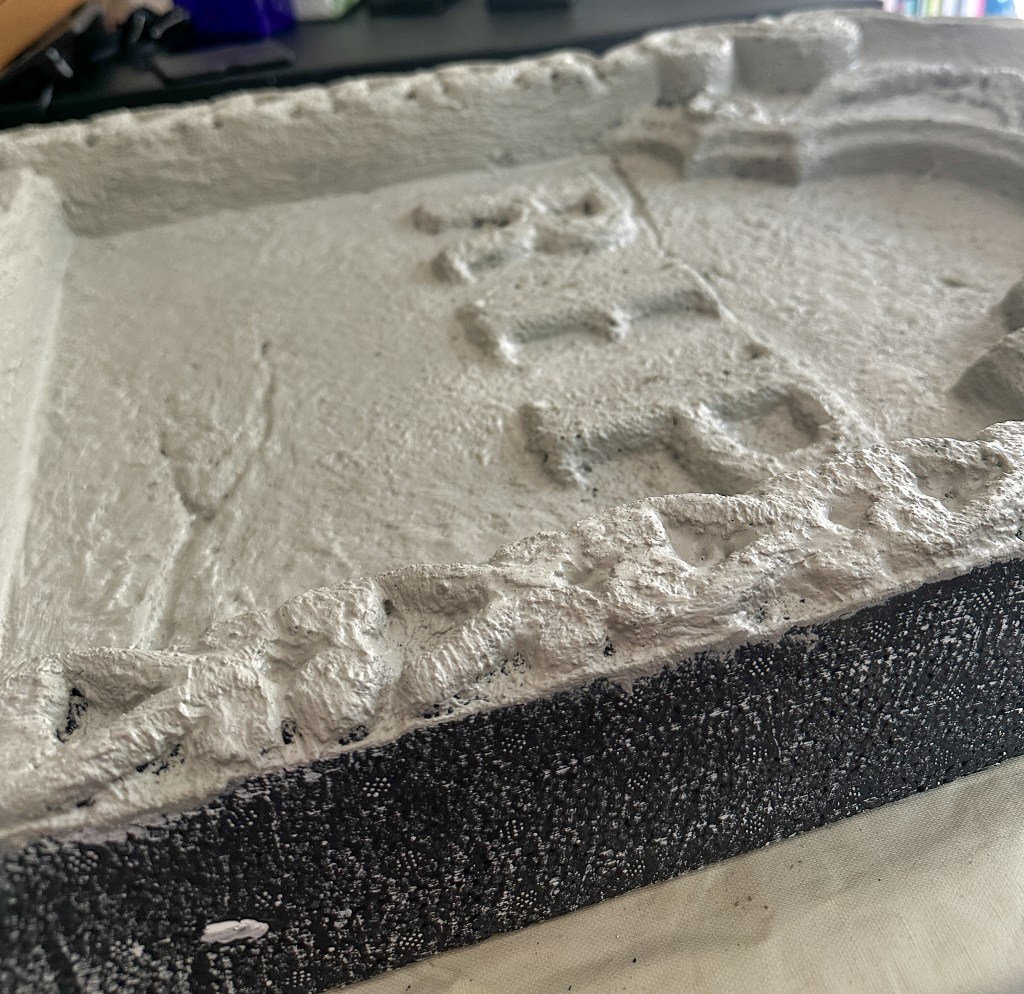
- Make sure to work the Drylok into any nooks and crannies caused by detailing or lettering. Below, the photo on the right side is only one coat. We made sure there wasn’t any exposed foam by the end of the second coat.
Adding Paint and Detail
Now that our gravestones have a realistic texture, it’s time to bring them to life with paint!
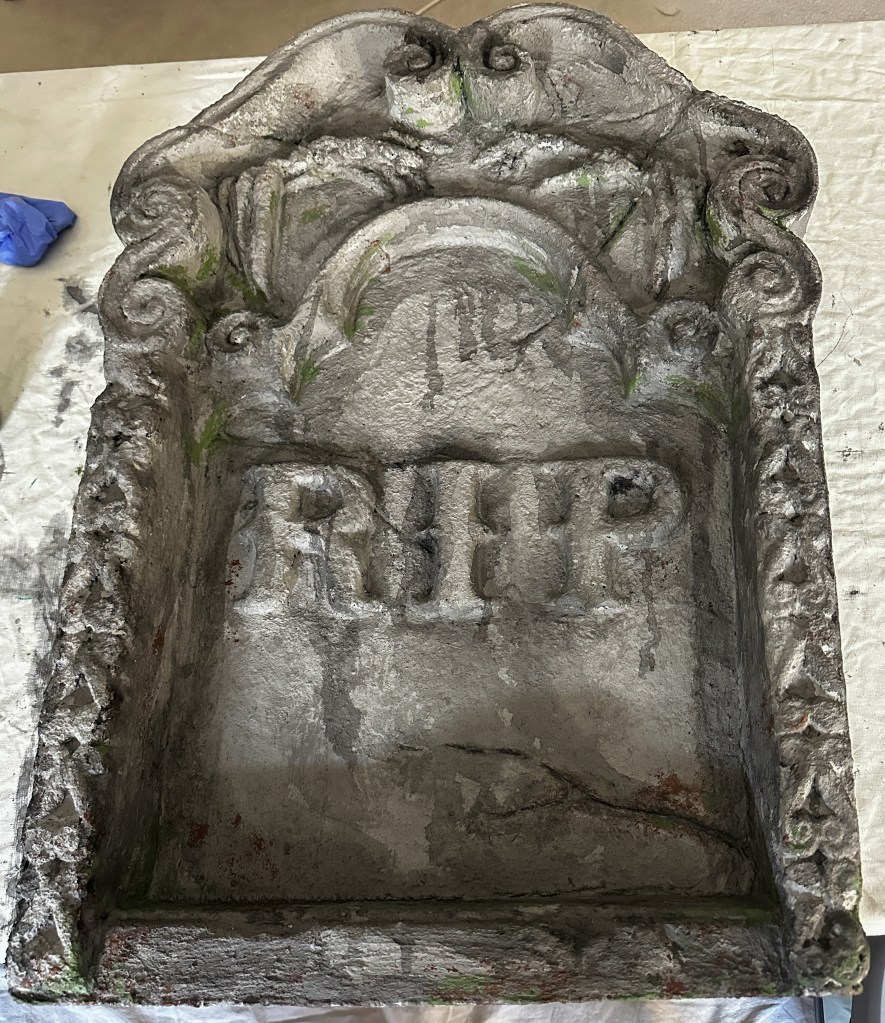
Our first pass was a paint wash of mostly black paint with a little brown, diluted with water. This technique create a weathered appearance and highlights the texture created by the Drylok. When you’re applying it, think where rain would run down the gravestone and pool, over centuries of it standing in a cemetery. Make sure to get it into the details, letters, and any cracks in your gravestone to bring back the depth that was lost in the Drylok base coat. You can also wipe off the paint wash in areas with a rag to get more color variation.
Next, we dabbed on brown and green paint to add dirt and moss details to the gravestones. We aimed for flat horizontal surfaces, the areas of the gravestones closest to the ground, and anywhere else dirt and moss might accumulate.
Let your artistic side shine as you add details to each gravestone, making them one-of-a-kind additions to your Halloween décor.
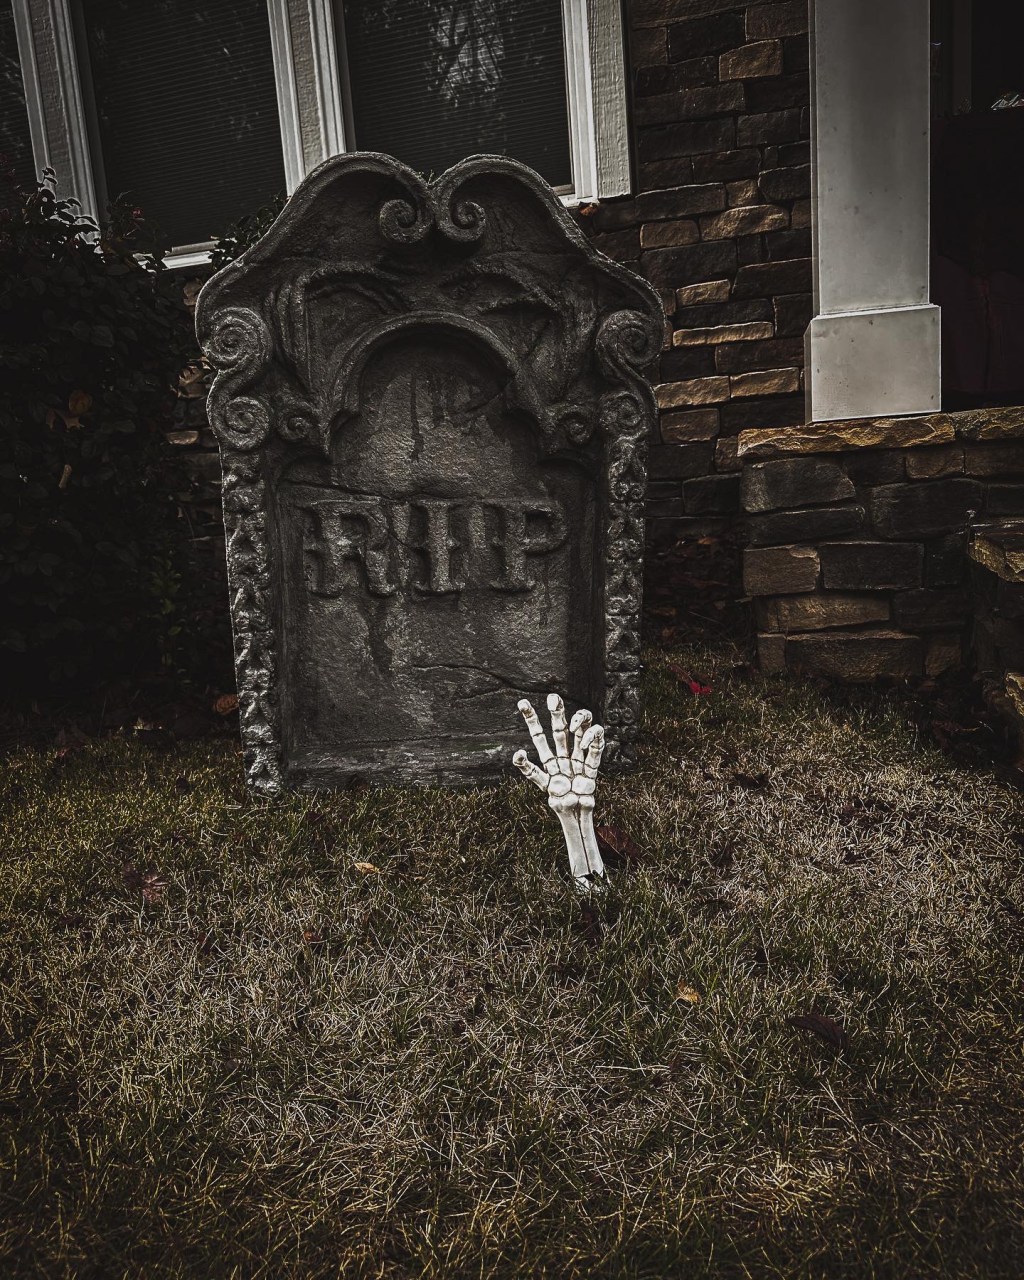
Mounting the Gravestones
Now that your foam gravestones are ready to set the stage for Halloween, let’s make sure they are securely mounted outside. We have dense clay soil and a lot of late fall storms, so what we set up might not be what you do exactly.
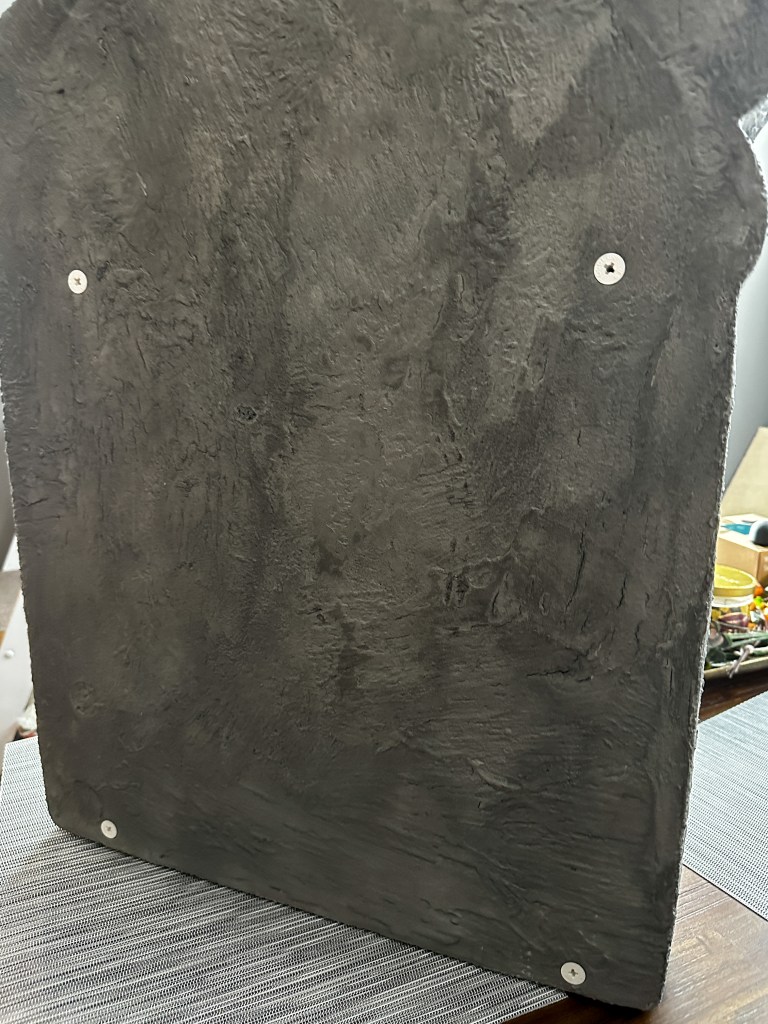
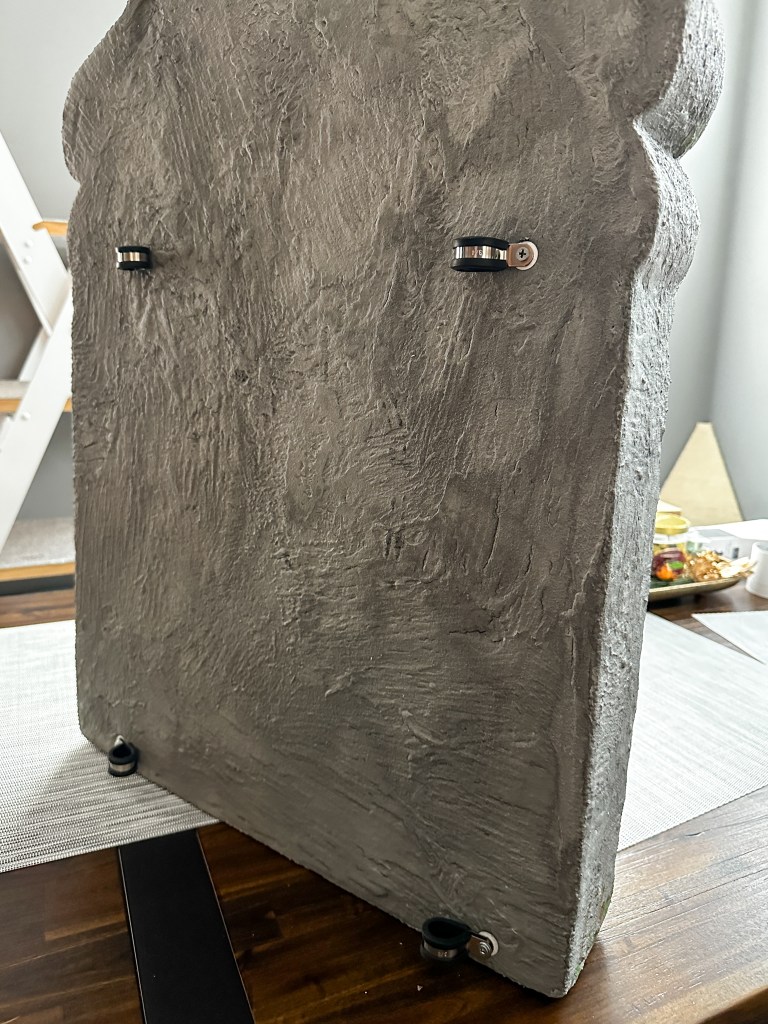
First, to make sure the hardware stayed secure in the foam, we used drywall anchors in each corner of the back of the gravestone. Then, we attached the cable mounts to the gravestone with the screws and washers. Outside, we drove metal poles into the ground, and slid the cable clamps over the poles.
Conclusion
Congratulations, my dear fiends! You have successfully transformed your outdoor space into a hauntingly realistic scene with foam gravestone décor. By following our detailed guide, you’ve added that perfect touch of Halloween magic to your home. Get ready to impress your neighbors, delight trick-or-treaters, and bring a smile to everyone’s face. We can’t wait to see your creations, so don’t forget to share them in the comments section or on social media. Happy haunting!